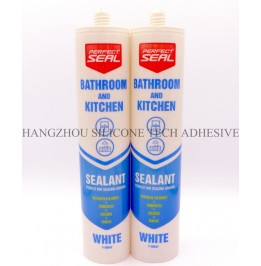
Effective Techniques for Removing Excess Sealant After Application
Properly removing excess sealant after application is essential for achieving a clean, professional finish in bathrooms, kitchens, or other areas requiring waterproofing. If left unaddressed, dried or semi-dried sealant can create unsightly streaks, attract dirt, or interfere with the functionality of fixtures. Below are practical methods to tackle excess material without damaging surfaces or compromising the seal.

The key to easy removal lies in addressing excess sealant before it cures completely. Most silicone or acrylic-based sealants remain workable for 15–30 minutes after application, depending on environmental conditions like humidity and temperature. During this window, excess material can be wiped away with minimal effort using basic tools.
For fresh sealant, keep a damp cloth or sponge nearby during application. As you finish a section, gently press the cloth along the edges of the sealant line to remove smudges or drips. Avoid using excessive water, as this can dilute the sealant or push it into unwanted areas. Instead, wring out the cloth thoroughly and refresh it frequently to prevent reapplying residue.
If working in a high-humidity environment, the curing process may accelerate, narrowing the window for easy cleanup. In such cases, focus on small sections at a time and prioritize immediate removal of excess material to avoid complications later.
When sealant begins to dry but hasn’t fully cured—typically within 1–2 hours of application—it becomes more challenging to remove but still manageable with the right approach. At this stage, a plastic scraper or an old credit card is ideal for gently lifting excess material without scratching surfaces like tiles, glass, or enamel.
Hold the scraper at a shallow angle (around 15–30 degrees) to the surface and apply light pressure as you slide it along the edge of the sealant line. Work in short, controlled strokes to avoid gouging the substrate or creating jagged edges. For curved surfaces, such as around sinks or bathtubs, use a flexible plastic tool to conform to the shape and minimize damage.
If the sealant resists removal, dampen a cloth with isopropyl alcohol (diluted with water if necessary) and apply it to the affected area for a few minutes. The alcohol helps soften the material, making it easier to scrape away. Always test this method on an inconspicuous spot first to ensure it doesn’t discolor or damage the surface.
Once sealant has cured completely—usually after 24 hours—it requires a more strategic approach to avoid harming the substrate. For small, isolated spots of excess material, a sharp utility knife or a specialized sealant removal tool can be used with caution.
Begin by scoring the edge of the cured sealant with the knife, creating a clean break between the excess material and the main seal. Hold the blade at a 45-degree angle to the surface and apply gentle, steady pressure to avoid slipping and scratching the substrate. For thicker layers of sealant, make multiple shallow passes rather than trying to cut through in one go.
After scoring, use a plastic scraper or your fingernail to pry up the loosened material. If the sealant is particularly stubborn, apply a commercial sealant softener or a mixture of white vinegar and water to the area and let it sit for 10–15 minutes. This can help break down the material’s structure, making it easier to remove.
Even after removing the bulk of the excess sealant, a sticky residue may remain on the surface. This residue can attract dirt over time and detract from the overall finish, so it’s important to address it thoroughly.
For non-porous surfaces like glass or ceramic tiles, dampen a cloth with isopropyl alcohol or a mild solvent (such as diluted dish soap) and wipe the area in a circular motion. Avoid abrasive scrubbers, as these can leave scratches. For porous surfaces like natural stone or untreated wood, use a soft-bristled brush and water to gently lift any remaining residue without forcing it deeper into the material.
Once the surface is clean, inspect the sealant line for irregularities or gaps. If necessary, touch up the sealant by applying a small amount of fresh material and smoothing it with a damp finger or a finishing tool. Allow the touched-up areas to cure fully before exposing them to moisture or heavy use.
To minimize cleanup efforts in future projects, practice precision during application. Use masking tape to create clean boundaries along the edges of the sealant line, leaving a narrow gap for the material to fill. Remove the tape immediately after smoothing the sealant, before it begins to cure, to ensure sharp, straight edges.
Additionally, load the application tool—whether it’s a caulk gun or a manual dispenser—with just enough sealant to complete the current section. Overfilling the tool increases the risk of drips and smudges, while underfilling may lead to gaps that require reapplication.
By mastering these removal techniques and adopting preventive measures, you can achieve a flawless sealant finish that enhances both the functionality and aesthetics of any space.
Copyright 2019 by Hangzhou Silicone Tech Adhesive Co., Ltd. All rights reserved.
Bathroom Sealant | Acrylic Sealant | Dow Corning 795 | Aquarium Sealant | Dow Corning 732 | Clear Silicone Sealant | Polysulfide Sealant | Glazing Sealant | Mirror Sealant | IG Sealant
Powered by Onepound