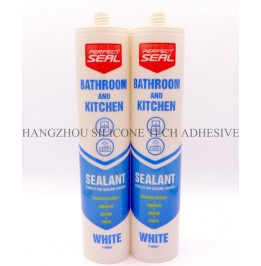
Effective Basement Grinding Techniques Before Bathroom Sealant Application
Properly preparing the substrate is critical for ensuring the longevity and performance of bathroom sealants. Inadequate grinding can lead to adhesion failures, moisture ingress, or premature cracking, especially in high-humidity environments like bathrooms. Below are actionable techniques to optimize substrate preparation before applying sealants.

Grinding serves two primary purposes: removing surface contaminants and creating a rough texture for mechanical adhesion. In bathrooms, substrates like tiles, concrete, or fiberglass often accumulate soap scum, mineral deposits, or old sealant residues. These layers act as barriers, preventing new sealants from bonding effectively. By grinding the surface, you expose a clean, porous layer that allows the sealant to penetrate and anchor firmly.
For example, a concrete floor with a smooth finish may require aggressive grinding to open its pores, while ceramic tiles might need lighter abrasion to avoid scratches. The goal is to achieve a uniform texture without compromising the structural integrity of the substrate.
The choice of tools depends on the substrate material and the desired finish. For hard surfaces like tiles or stone, diamond-tipped grinding discs are ideal due to their durability and precision. These discs can remove thin layers of material without generating excessive heat, which could crack the substrate.
For softer materials like concrete or plaster, resin-bonded abrasive discs offer a balance between aggression and control. Start with a coarse grit (e.g., 40–80 grit) to remove surface imperfections, then switch to a finer grit (e.g., 120–220 grit) for a smoother finish. Avoid skipping grits, as this can leave deep scratches that compromise adhesion.
Handheld angle grinders are suitable for small areas or corners, while floor grinders with dust extraction systems are more efficient for large surfaces. Always wear protective gear, including a respirator, goggles, and gloves, to minimize exposure to airborne particles.
Initial Inspection and Cleaning
Begin by inspecting the substrate for cracks, holes, or loose material. Use a hammer and chisel to remove any unstable sections, then sweep or vacuum the area to eliminate loose debris. For stubborn stains, apply a pH-neutral cleaner and scrub with a stiff-bristled brush.
Coarse Grinding to Remove Surface Layers
Attach a coarse-grit abrasive disc to your grinder and start at a low speed to avoid gouging the surface. Work in overlapping passes, keeping the grinder moving to prevent heat buildup. Focus on areas with heavy contamination or uneven textures, such as joints between tiles or around drainage fixtures.
For concrete floors, grind until the surface feels consistently rough to the touch. For tiles, stop once the glaze is removed and the underlying clay is exposed. Periodically stop to check your progress and adjust the pressure or grit as needed.
Fine Grinding for Smooth, Even Texture
Switch to a finer-grit disc and repeat the grinding process, this time aiming for a uniform texture. The goal is to create a surface that feels slightly rough but free of deep scratches or pits. Pay special attention to edges and corners, as these areas are prone to chipping during grinding.
If using a floor grinder, adjust the speed and pressure to match the substrate’s hardness. For handheld grinders, maintain a steady grip and avoid pressing too hard, as this can cause the tool to bounce and create uneven patches.
Final Cleaning and Drying
After grinding, thoroughly clean the surface with a vacuum cleaner equipped with a HEPA filter to remove all dust particles. Follow up with a damp cloth or sponge to wipe away any remaining residue. Allow the substrate to dry completely before applying sealant, as moisture trapped beneath the sealant can lead to bubbling or peeling.
For porous substrates like concrete, consider using a leaf blower or compressed air to ensure no dust remains in the pores. If the substrate is non-porous, such as glazed tiles, a simple wipe-down with isopropyl alcohol may suffice to remove oils or fingerprints.
By following these techniques, you can create a substrate that maximizes the adhesive properties of bathroom sealants, ensuring a watertight, durable finish that withstands daily use and moisture exposure.
Copyright 2019 by Hangzhou Silicone Tech Adhesive Co., Ltd. All rights reserved.
Bathroom Sealant | Acrylic Sealant | Dow Corning 795 | Aquarium Sealant | Dow Corning 732 | Clear Silicone Sealant | Polysulfide Sealant | Glazing Sealant | Mirror Sealant | IG Sealant
Powered by Onepound