News & Skills

Professional Manufacturer of silicone sealant and insulating glass sealant

How to apply sanitary silicone

Oct 12,2026 | Views: 29

How to apply sanitary silicone

A clean, mould-free sanitary seal comes down to preparation far more than technique. Strip the old sealant out completely, clean and dry the joint, then run one continuous bead and tool it smooth before a skin forms. Keep water off the joint for 24 hours. Get those steps right and a sanitary silicone will stay neat and hygienic for years. Here is the full method, step by step.

Before You Start: Tools and Preparation

Have everything to hand before you open the cartridge, because the sealant starts curing as soon as it is exposed to air.

  • Sealant gun and a sanitary (mould-resistant) silicone cartridge
  • Silicone remover tool, silicone remover gel, and a plastic scraper
  • Isopropyl alcohol or methylated spirit, plus clean lint-free cloths
  • Smoothing tool or a small spatula, and masking tape for crisp edges

Work in a ventilated room and aim for a surface temperature above 5 °C. Cold, damp conditions slow the cure and weaken the bond.
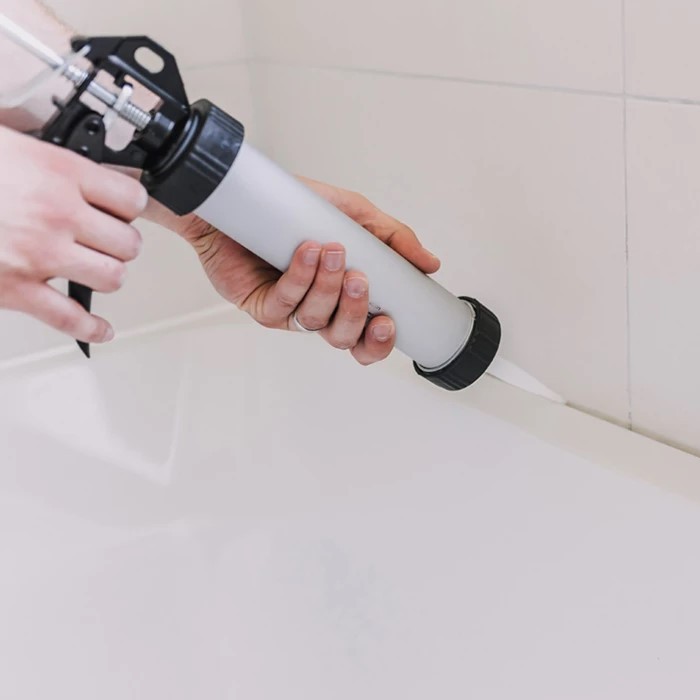
Step-by-Step: Applying the Bead

  1. Strip the old sealant completely. Cut out the bulk, apply remover gel to the film, then scrape until the substrate feels hard. New silicone will not bond to old residue.
  2. Clean and dry. Wipe the joint with alcohol and let it dry fully. Trapped moisture is the most common cause of early failure.
  3. Mask both sides of the joint. Run tape along each edge, leaving only the joint exposed. This is what gives a straight, professional line.
  4. Cut the nozzle. Trim the tip at roughly 45° to match the joint width — usually a 4 to 6 mm opening is enough.
  5. Apply one continuous bead. Hold the gun at a steady 45° and push it forward rather than dragging it, so sealant fills the joint instead of sitting on top.
  6. Tool it smooth immediately. Smooth the bead in a single pass with a wet finger or tool before a skin forms — usually within the first few minutes.
  7. Remove the tape while the sealant is still wet. Peel it away at a low angle to leave a sharp edge.
  8. Let it cure before wetting. Keep the joint dry for at least 24 hours, longer in cold or humid conditions.

how to apply sanitary silicone

Common Mistakes That Cause Early Failure

  • Going over old silicone. The new bead sits on the old one and peels away. Strip it out first.
  • Sealing a wet or dusty surface. Sealant bonds to contamination, not to the tile or tray.
  • Tooling too late. Once a skin forms, smoothing tears the surface and traps dirt.
  • Beads that are too thin. A shallow bead cannot stretch with joint movement and splits along the edge.
  • Getting water on it too soon. A shower sprayed within hours can wash out the uncured seal.

Choosing the Right Product for the Joint

Sanitary silicone is the default for wet rooms, but the substrate still decides the specification. For glass, ceramics, and glazed tiles, an acetoxy silicone sealant grips fast and cures quickly. Around natural stone, chrome, and painted surfaces, use neutral cure silicone, which releases no acetic acid and will not corrode or stain. Where a joint has to be painted, the acrylic sealant range is the correct choice — no silicone takes paint reliably.

Getting a Neat, Mould-Free Finish

A mould-resistant additive protects the bead itself, not the substrate underneath, so preparation still governs how long the seal lasts. Keep the room ventilated, wipe the joint down regularly, and remove soap scum before it hardens. Where mould does appear, it usually sits on the surface and wipes away — growth inside the bead means the joint was contaminated at the time of application and needs to be redone.

Final Thoughts

Applying sanitary silicone is a short job done well or a long job done twice. Remove every trace of the old bead, clean and dry the joint, run a single continuous bead, tool it within minutes, and keep water off it for a day. Follow that order and the seal stays hygienic and watertight instead of failing within months.


Prev: Why is my all-purpose silicone not curing properly? Next: What is sanitary silicone?

Copyright 2019 by Hangzhou Silicone Tech Adhesive Co., Ltd. All rights reserved.

Bathroom Sealant | Acrylic Sealant | Dow Corning 795 | Aquarium Sealant | Dow Corning 732 | Clear Silicone Sealant | Polysulfide Sealant | Glazing Sealant | Mirror Sealant | IG Sealant

    Powered by Onepound