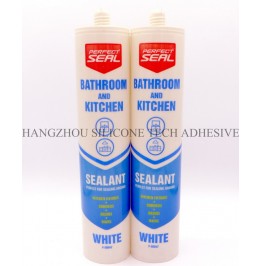
Sealing Gaps Between Plastic Components and Tiles: Best Practices for Long-Lasting Results
Combining plastic parts with tiled surfaces in bathrooms, kitchens, or utility areas requires careful sealing to prevent water ingress, mold growth, and structural damage. The process involves selecting compatible materials, preparing surfaces properly, and applying techniques tailored to the flexibility of plastic and the rigidity of tiles. Below are step-by-step guidelines to ensure a durable, watertight bond.

Plastic and tile have different thermal expansion rates and surface textures, which can affect adhesion and longevity of the sealant. Before starting, assess the type of plastic—such as PVC, acrylic, or polyethylene—and the tile material, whether ceramic, porcelain, or natural stone. Some plastics may contain plasticizers or additives that react with certain sealants, leading to discoloration or weakening over time.
The joint’s width and depth also play a role. Narrow gaps (less than 5mm) may require a self-leveling sealant for a smooth finish, while wider joints (5–15mm) benefit from a non-sag formula to prevent sagging before curing. For joints exposed to frequent movement, such as those around a shower tray or bathtub, choose a flexible sealant that can accommodate slight shifts without cracking.
Design the joint to allow for drainage and ventilation. Avoid creating pockets where water can accumulate, as stagnant moisture accelerates sealant degradation. If the plastic component is removable, consider leaving a small gap (1–2mm) between it and the tile to reduce stress on the sealant during installation or removal.
Proper cleaning is critical for strong adhesion between the sealant, plastic, and tile. Start by removing old sealant, dust, or debris using a plastic scraper or a utility knife with a rounded tip to avoid scratching surfaces. For stubborn residue, dampen a cloth with isopropyl alcohol or a mild detergent solution and wipe the area thoroughly.
On plastic surfaces, roughen the area slightly with fine-grit sandpaper (220–400 grit) to create a better grip for the sealant. Wipe away sanding dust with a tack cloth or a damp microfiber cloth. Avoid using abrasive cleaners or solvents that could melt or discolor the plastic.
Tiles, especially glazed or polished varieties, may have a smooth, non-porous finish that resists adhesion. Clean the tile surface with a degreaser to remove soap scum, oils, or mineral deposits. For unglazed or porous tiles, such as natural stone, use a pH-neutral cleaner to avoid etching the surface. Rinse both plastic and tile with clean water and allow them to dry completely before proceeding.
Masking the edges of the joint with painter’s tape ensures straight, professional-looking lines and simplifies cleanup. Apply the tape 1–2mm away from the joint on both the plastic and tile surfaces, pressing it firmly to prevent sealant from seeping underneath. For curved or irregular joints, use flexible masking tape or cut standard tape into strips to conform to the shape.
If the joint is deep, insert a backer rod made of closed-cell foam into the gap before sealing. The backer rod acts as a bond breaker, controlling the depth of the sealant and reducing material usage. Choose a backer rod diameter slightly larger than the joint width to ensure a snug fit. Push it into place using a blunt tool, leaving about 3–5mm of space for the sealant.
For joints where plastic meets tile at an angle, such as a corner or edge, design the sealant bead to follow the contour of the surfaces. A convex or rounded profile sheds water more effectively than a flat or concave finish, reducing the risk of pooling and subsequent damage.
Load the sealant into a caulk gun and cut the nozzle at a 45-degree angle to match the joint width. Start at one end of the joint and apply steady pressure to the trigger, moving the gun smoothly along the gap. Keep the nozzle in contact with both the plastic and tile surfaces to ensure even coverage.
For vertical or overhead joints, work in small sections (30–50cm at a time) to prevent the sealant from sagging before it cures. If the sealant begins to droop, pause and use a shaping tool or your finger (dipped in soapy water) to press it back into place.
After applying the sealant, smooth the surface with a damp finger or a plastic spatula. Use light, circular motions to blend the edges and create a consistent finish. If the joint is visible, such as along a countertop or shower enclosure, take extra care to remove air bubbles or excess material.
Allow the sealant to cure undisturbed for the time recommended by the manufacturer, typically 24–48 hours, depending on humidity and temperature. Avoid exposing the joint to water, steam, or extreme temperatures during this period, as premature contact can weaken the bond or cause discoloration.
Once cured, inspect the joint for any gaps, cracks, or uneven areas. If necessary, touch up the sealant with a small amount of fresh material, blending it carefully with the existing bead. For joints in high-traffic or high-moisture areas, consider applying a thin layer of sealant protector or wax to enhance durability and ease cleaning.
Regular maintenance, such as wiping the joint with a mild cleaner and a soft cloth, helps prolong its lifespan. Avoid using abrasive scrubbers or chemical-heavy products, which can erode the sealant over time. By following these steps, you can create a watertight, aesthetically pleasing seal between plastic components and tiles that withstands daily use and environmental stressors.
Copyright 2019 by Hangzhou Silicone Tech Adhesive Co., Ltd. All rights reserved.
Bathroom Sealant | Acrylic Sealant | Dow Corning 795 | Aquarium Sealant | Dow Corning 732 | Clear Silicone Sealant | Polysulfide Sealant | Glazing Sealant | Mirror Sealant | IG Sealant
Powered by Onepound