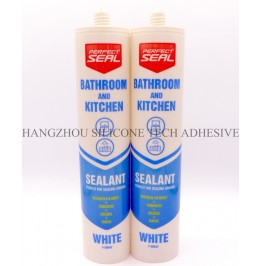
Enhancing Waterproofing in Shower Zone Sealant: Advanced Techniques for Long-Term Protection
Shower zones are prone to constant moisture exposure, making sealant durability a top priority. Even professionally applied sealant can degrade over time due to temperature fluctuations, cleaning chemicals, or mechanical stress. Strengthening its waterproofing properties requires a combination of material selection, surface preparation, and application strategies tailored to high-humidity environments. Below are actionable methods to reinforce sealant performance and prevent costly water damage.

Not all joints in a shower require the same level of reinforcement. Focus on areas where water pools, moves dynamically, or faces frequent temperature changes. Common weak points include the intersection between the shower tray and walls, corners where tiles meet, gaps around fixtures like faucets or showerheads, and the base of sliding shower doors. These spots are more susceptible to cracking, shrinkage, or disbondment, allowing water to penetrate behind tiles or into substructures.
Inspect existing sealant for signs of wear, such as discoloration, peeling, or mold growth. Use a flashlight to check shadowed areas, as subtle gaps may not be visible under ambient light. If the sealant feels spongy or pulls away when lightly pressed, it’s likely compromised and needs replacement or reinforcement.
For new installations, design joints to minimize stress. Avoid sharp 90-degree angles in favor of slightly rounded or beveled edges, which distribute pressure more evenly. Ensure a minimum joint width of 3–5mm to accommodate sealant expansion and contraction without splitting.
Proper cleaning is the foundation of effective waterproofing. Start by removing old sealant using a plastic scraper or a utility knife with a rounded tip to prevent scratching tiles or fixtures. For stubborn residue, dampen a cloth with isopropyl alcohol or a mild detergent solution and scrub gently. Avoid abrasive pads or steel wool, which can damage surfaces and create micro-scratches that trap moisture.
Tiles, especially glazed or polished varieties, often have a smooth, non-porous finish that resists adhesion. Roughen the tile surface near the joint with fine-grit sandpaper (220–400 grit) to create a better grip for the sealant. Wipe away sanding dust with a tack cloth or a damp microfiber cloth. For natural stone tiles, use a pH-neutral cleaner to avoid etching or staining.
Shower trays or acrylic bases may contain plasticizers that interact with certain sealants. Clean these surfaces with a degreaser to remove oils or residues, then rinse thoroughly with water. Allow all surfaces to dry completely—a process that may take 12–24 hours depending on humidity—before applying new sealant.
Backer rods or bonding tapes can significantly improve sealant performance in wide or deep joints. These materials act as a bond breaker, preventing three-sided adhesion (where sealant sticks to the bottom and both sides of the joint), which can lead to cracking under stress. For joints deeper than 6mm, insert a closed-cell foam backer rod into the gap, pressing it firmly to leave about 3–5mm of space for the sealant.
In areas where movement is expected, such as joints between a shower tray and a tiled wall, use a flexible bonding tape instead of a backer rod. These tapes have an adhesive backing and a compressible core, allowing them to absorb vibrations or shifts without transferring stress to the sealant. Apply the tape along the joint, ensuring it sits flush with the surfaces before sealing over it.
For joints around fixtures like faucets or showerheads, wrap the base with waterproof putty or a silicone-based gasket before applying sealant. This creates an additional barrier against water ingress and reduces the risk of leaks at vulnerable connection points.
Choose a sealant formulated for high-moisture environments, prioritizing flexibility and mold resistance. Load the sealant into a caulk gun and cut the nozzle at a 45-degree angle to match the joint width. Apply steady pressure to the trigger, moving the gun smoothly along the gap to ensure even coverage. For vertical joints, work in small sections (30–50cm at a time) to prevent sagging.
After applying the sealant, shape it immediately using a damp finger or a plastic spatula dipped in soapy water. Use light, circular motions to press the sealant into the joint, eliminating air bubbles and creating a convex profile that sheds water effectively. Avoid overworking the sealant, as this can introduce air pockets or weaken the bond.
For joints in high-traffic areas, such as the base of a sliding shower door, apply a second thin layer of sealant after the first has cured partially (usually 1–2 hours after application). This “double-sealing” technique adds thickness and resilience without extending the overall curing time significantly.
Allow the sealant to cure undisturbed for at least 24–48 hours, depending on the manufacturer’s recommendations. Keep the shower zone dry during this period by avoiding showers or steam exposure. If the area must be used, cover the fresh sealant with plastic wrap or a temporary shield to protect it from water.
Once cured, inspect the sealant for any gaps, cracks, or uneven areas. Use a sharp utility knife to trim excess material carefully, following the contour of the joint. For stubborn residue, dampen a cloth with isopropyl alcohol and wipe gently.
Regular maintenance extends the lifespan of reinforced sealant. Wipe the joint weekly with a mild, non-abrasive cleaner and a soft cloth to remove soap scum or mineral deposits. Avoid using bleach or ammonia-based products, which can degrade silicone sealants over time. If mold appears, scrub the area with a solution of equal parts water and white vinegar, then rinse and dry thoroughly.
By combining thorough preparation, strategic reinforcement, and careful application, you can create a shower zone sealant that resists water penetration, mold growth, and mechanical damage for years to come.
Copyright 2019 by Hangzhou Silicone Tech Adhesive Co., Ltd. All rights reserved.
Bathroom Sealant | Acrylic Sealant | Dow Corning 795 | Aquarium Sealant | Dow Corning 732 | Clear Silicone Sealant | Polysulfide Sealant | Glazing Sealant | Mirror Sealant | IG Sealant
Powered by Onepound