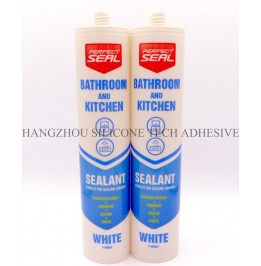
Finger-Pressing Techniques for Perfecting Bathroom Sealant Finishes After Application
Achieving a smooth, professional-looking sealant finish in bathrooms requires more than just precise application—post-application shaping is equally critical. Finger-pressing, a common method for refining sealant edges, demands attention to timing, tools, and technique to avoid common pitfalls like uneven surfaces or compromised adhesion. Below are actionable strategies to master this step and ensure long-lasting, waterproof joints.

The curing stage of sealant dictates the success of finger-pressing. Applying pressure too early can distort the bead or push it out of the joint, while waiting too long may result in a rough, unworkable surface. Most silicone or acrylic sealants reach a “tack-free” state within 5–15 minutes after application, depending on humidity and temperature. Test the sealant by lightly touching it with a fingertip—if it feels sticky but doesn’t transfer onto your skin, it’s ready for shaping.
In high-humidity environments, such as bathrooms, curing times may accelerate. Use a timer to track the interval between application and shaping, especially when working on multiple joints. If the sealant starts to harden before you finish, pause and resume only after rehydrating the surface with a fine mist of water or a damp cloth.
For vertical or overhead joints, prioritize shaping within the first 3–5 minutes to prevent sagging. Work in small sections, starting at the top and moving downward, to maintain control over the sealant’s placement and texture.
Before shaping the sealant, prepare your hands and any auxiliary tools to minimize friction and achieve a consistent finish. Dip your fingertips in a bowl of soapy water or a mixture of water and a few drops of dish soap. This lubricant reduces adhesion between your skin and the sealant, allowing smooth, controlled movements without pulling or dragging the material.
Alternatively, wrap a small piece of plastic wrap or a latex glove around your finger for a reusable, non-stick surface. This method is particularly useful for intricate joints or when working with dark-colored sealants that may stain skin. For angled or curved edges, use a shaping tool like a rounded plastic spatula or a silicone trowel dipped in soapy water to replicate the finger-pressing effect with greater precision.
Keep a damp cloth nearby to wipe away excess sealant that accumulates on your fingers or tools. Regular cleaning prevents transfer of material to unintended areas, ensuring clean lines and a polished appearance.
The approach to finger-pressing varies based on the joint’s design and location. For flat, horizontal joints like those between a bathtub and tile, press your lubricated fingertip into the sealant at a 45-degree angle, applying gentle but firm pressure. Move along the joint in a continuous motion, maintaining consistent speed to avoid creating ridges or depressions.
For inside corners, such as where two walls meet in a shower enclosure, use the tip of your finger to press the sealant into the angle, creating a rounded, watertight seal. Rotate your finger slightly as you move to ensure even coverage on both surfaces. If the joint is particularly tight, switch to a shaping tool to access hard-to-reach areas without compromising the finish.
Outside corners, like those on a countertop or vanity, require a different strategy. Press the sealant outward with your fingertip to form a slight convex curve, which sheds water more effectively than a flat or concave surface. Use light, overlapping strokes to blend the edges and prevent visible seams.
One frequent error is applying excessive pressure, which can flatten the sealant bead or expose gaps beneath the surface. Start with light pressure and gradually increase it until the sealant conforms to the desired shape without overcompressing. If the joint appears too thin, remove the sealant and reapply a larger bead before shaping again.
Another pitfall is neglecting to clean the joint before shaping. Dust, soap scum, or old sealant residue can interfere with adhesion, leading to peeling or cracking over time. Wipe the area with a damp cloth and a mild detergent before application, and ensure it’s completely dry before proceeding.
Finally, avoid rushing the process. Finger-pressing requires patience and attention to detail, especially in visible areas like front-facing tiles or glass shower doors. Take breaks if needed to maintain steady hands and a clear focus, as fatigue can lead to uneven finishes or accidental damage to the surrounding surfaces.
After shaping the sealant, allow it to cure undisturbed for at least 24 hours before exposing it to water or moisture. This period ensures the material reaches full strength and adhesion, reducing the risk of premature failure. Keep the bathroom well-ventilated during curing by opening windows or using a fan to accelerate drying without introducing debris.
Once cured, inspect the joint for any imperfections, such as air bubbles or uneven edges. Use a sharp utility knife or a sealant remover tool to carefully trim excess material, following the contour of the joint. For stubborn residue, dampen a cloth with isopropyl alcohol and gently rub the area, taking care not to damage the surrounding tiles or fixtures.
Regular maintenance, such as wiping the joint with a mild cleaner and a soft cloth, helps prolong its lifespan. Avoid abrasive scrubbers or chemical-heavy products, which can erode the sealant over time. By combining proper shaping techniques with ongoing care, you can create a bathroom sealant finish that remains functional and attractive for years.
Copyright 2019 by Hangzhou Silicone Tech Adhesive Co., Ltd. All rights reserved.
Bathroom Sealant | Acrylic Sealant | Dow Corning 795 | Aquarium Sealant | Dow Corning 732 | Clear Silicone Sealant | Polysulfide Sealant | Glazing Sealant | Mirror Sealant | IG Sealant
Powered by Onepound