Optimal Sequence for Sealant Application and Tile Grouting: A Step-by-Step Guide
When renovating bathrooms or kitchens, the order of applying sealant and tile grout significantly impacts durability and aesthetics. Both tasks involve filling gaps, but their purposes differ: sealant prevents water penetration in joints exposed to moisture, while grout stabilizes tiles and enhances visual appeal. Misordering these steps can lead to cracks, mold growth, or rework. Here’s how to plan the workflow for professional results.

Tile grout is a cement-based or epoxy mixture used to fill the spaces between tiles, providing structural support and a polished look. It’s designed for dry or moderately damp areas but isn’t inherently waterproof. Sealant, on the other hand, is a flexible, waterproof compound applied to joints around sinks, showers, or backsplashes where movement or moisture exposure occurs.
Grout must cure fully before sealant application to avoid trapping moisture beneath the surface, which could weaken adhesion. Conversely, sealant applied too early over uncured grout may crack as the grout shrinks during drying. Timing and surface preparation are critical to ensure both materials bond correctly and perform as intended.
Begin by laying tiles according to your design, ensuring even spacing (typically 1–3mm for grout lines). Use tile spacers to maintain consistent gaps, which simplify grouting later. After the adhesive cures (usually 24–48 hours), remove spacers and clean the joints thoroughly. Vacuum or brush away dust, debris, or excess adhesive to create a smooth, even surface for grout.
For areas requiring sealant, such as corners between walls and floors or around fixtures, leave those joints empty during tiling. These gaps will be filled with sealant after grouting to accommodate movement and prevent water ingress. Mark these sections with painter’s tape to avoid accidentally grouting them.
Mix the grout following the manufacturer’s instructions, achieving a peanut butter-like consistency. Use a rubber float to press the grout into the joints at a 45-degree angle, ensuring full coverage. Work in small sections to prevent the grout from drying prematurely. After filling the joints, wipe away excess grout with a damp sponge, rinsing frequently to avoid smearing.
Allow the grout to cure for the time recommended by the manufacturer (usually 24–72 hours, depending on type and humidity). Avoid walking on tiled floors or exposing the area to water during this period. Test the grout’s hardness by gently pressing a fingernail—if it leaves a mark, it needs more time to cure.
Once the grout is fully cured, inspect the joints designated for sealant. Ensure they’re clean, dry, and free of grout residue. Use a utility knife or grout saw to widen any gaps slightly (to 3–5mm) if they’re too narrow, as sealant requires adequate depth for flexibility and adhesion. For vertical joints, check that the surface is level to prevent sealant from sagging.
Apply painter’s tape along both edges of the joint to create clean lines and protect adjacent tiles from excess sealant. This step is especially important in high-visibility areas like shower enclosures or kitchen backsplashes. Remove the tape immediately after smoothing the sealant to avoid pulling up the material as it cures.
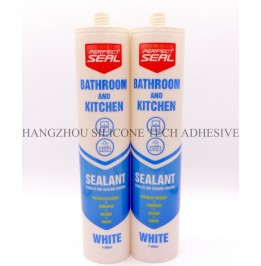
Load a caulk gun with a tube of waterproof sealant (silicone or polyurethane-based, depending on the application). Cut the nozzle at a 45-degree angle to match the joint width, ensuring a precise bead size. Hold the gun at a consistent angle and apply steady pressure as you move along the joint, filling it completely without gaps or air bubbles.
Smooth the sealant with a caulk finishing tool or a damp finger dipped in soapy water. Use a single, continuous motion to create a concave shape, which enhances water runoff and prevents pooling. For long joints, work in sections to maintain control over the bead’s shape and thickness.
Allow the sealant to cure undisturbed for at least 24 hours, or as directed by the manufacturer. Avoid exposing the area to water, steam, or heavy traffic during this time. After curing, check the sealant for uniformity, ensuring no cracks, gaps, or uneven sections. If imperfections are found, remove the affected area with a plastic scraper and reapply fresh sealant.
Test the sealant’s flexibility by gently pressing it with a fingernail—it should compress slightly without tearing. For joints around fixtures like sinks or tubs, verify that the sealant forms a continuous barrier against water. A well-applied sealant will remain pliable for years, adapting to minor movements without cracking.
By following this sequence—tiling, grouting, curing, and finally sealing—you ensure each material performs its role effectively. Proper timing and attention to detail during each step minimize the risk of leaks, mold, or premature wear, resulting in a durable, visually appealing finish that stands up to daily use.
Copyright 2019 by Hangzhou Silicone Tech Adhesive Co., Ltd. All rights reserved.
Bathroom Sealant | Acrylic Sealant | Dow Corning 795 | Aquarium Sealant | Dow Corning 732 | Clear Silicone Sealant | Polysulfide Sealant | Glazing Sealant | Mirror Sealant | IG Sealant
Powered by Onepound