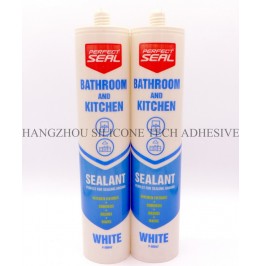
Ensuring a Smooth Finish: How to Inspect Bathroom Sealant for Evenness After Application
Achieving a flawless, even sealant finish in bathrooms is essential for both aesthetics and functionality. Uneven or lumpy sealant can trap moisture, leading to mold growth or premature deterioration. After applying sealant, thorough inspection and adjustments are necessary to guarantee a professional-looking result. Here’s how to assess and refine the surface for long-lasting performance.

Natural daylight or bright, white LED lighting is ideal for spotting imperfections. Start by examining the sealant from multiple angles, including side views, to detect unevenness or air bubbles. Pay close attention to corners and edges, where excess material often accumulates. If shadows obscure details, use a portable work light or flashlight to highlight texture variations.
Look for signs of overapplication, such as bulging or wavy lines, which indicate uneven pressure during smoothing. Conversely, dips or gaps suggest insufficient material was applied. For vertical joints, check for sagging, which occurs when the sealant flows downward before curing. These issues are easier to correct immediately after application, so inspect the joint as soon as it’s shaped.
Run a clean, dry finger lightly over the sealant to feel for inconsistencies. A properly finished joint should feel uniformly smooth, with no ridges, bumps, or sticky spots. If the surface feels tacky, it may still be curing—avoid touching it further until fully dry. For textured tiles, use a gloved finger or a piece of fine sandpaper wrapped around a finger to assess smoothness without leaving marks.
Pay attention to transitions between the sealant and adjacent surfaces, like tiles or fixtures. A sharp edge or noticeable step indicates poor blending, which can collect dirt and water. If the joint feels rough, it may require additional smoothing with a silicone tool or a damp cloth before curing completes.
For minor imperfections, use a silicone finishing tool or a plastic spatula dipped in soapy water. Gently press and drag the tool along the joint to redistribute excess material and create a concave curve. Work in short sections to maintain control, especially in tight spaces like around faucets or showerheads. If the sealant has already cured partially, avoid forcing adjustments—this can tear the material and compromise adhesion.
For stubborn lumps or uneven areas, wait until the sealant is fully cured (typically 24–48 hours), then carefully trim excess with a sharp, non-metallic blade. Hold the blade at a shallow angle to avoid gouging the substrate. After trimming, smooth the edge with fine-grit sandpaper or a polishing pad to blend it seamlessly into the joint.
Air bubbles trapped beneath the sealant surface appear as small, round indentations. To fix them, use a pin or needle to puncture the bubble gently, then press the surrounding material flat with a finger or tool. If the bubble reappears, the sealant may have been applied too thickly—scrape away the excess and reapply a thinner layer.
Cracks or splits in the sealant often result from rapid drying or insufficient adhesion. If detected early, reapply a fresh bead over the damaged area, ensuring the substrate is clean and dry. For fully cured cracks, remove the old sealant with a plastic scraper, clean the joint thoroughly, and reapply a new layer following proper techniques.
The curing process affects inspection accuracy. Most sealants reach initial cure within 12–24 hours but remain slightly flexible for several days. Avoid heavy cleaning or water exposure until the manufacturer’s recommended cure time has passed. In humid conditions, curing may slow down, increasing the risk of surface imperfections. Use a dehumidifier or fan to accelerate drying in enclosed spaces.
Temperature fluctuations can also impact the finish. Cold environments may cause the sealant to harden unevenly, while heat can make it tacky and difficult to shape. Work within the temperature range specified by the manufacturer (usually 10°C–30°C) for optimal results. If the room is too cold, use a space heater to maintain a stable temperature during application and curing.
By combining visual checks, tactile feedback, and targeted adjustments, you can ensure your bathroom sealant achieves a flawless, even finish. Regular maintenance, such as cleaning the joint monthly with a mild detergent, will prolong its lifespan and prevent future issues. Attention to detail during inspection and refinement guarantees a durable, waterproof seal that enhances both function and appearance.
Copyright 2019 by Hangzhou Silicone Tech Adhesive Co., Ltd. All rights reserved.
Bathroom Sealant | Acrylic Sealant | Dow Corning 795 | Aquarium Sealant | Dow Corning 732 | Clear Silicone Sealant | Polysulfide Sealant | Glazing Sealant | Mirror Sealant | IG Sealant
Powered by Onepound