E-mail:
sales@silicone-sealant-china.com

There's a strip of stone sitting between your bathroom and the rest of your house. You walk over it every day. You never think about it. It's just a threshold — a piece of marble, granite, or engineered stone that marks the boundary between the wet zone and the dry zone.
But that strip of stone is also the most common path for water to escape your bathroom. And when water escapes, it doesn't stay in the bathroom. It travels under the floor, soaks into the subfloor, rots the joists, and eventually shows up as buckling hardwood or warped laminate in the hallway. All because nobody sealed a gap the width of a hair.
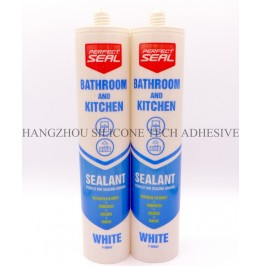
The threshold stone joint is the most overlooked seal in any bathroom. And it's the one that causes the most expensive damage.
You'd think a solid piece of stone would block water completely. It does — mostly. But the edges where the stone meets the floor tile on either side? Those are gaps. Tiny ones, usually less than a millimeter wide. And water doesn't need a wide gap. It needs a crack.
Every time you shower, water splashes onto the bathroom floor. It runs toward the drain, but not all of it makes it. Some of it pools at the threshold. Some of it seeps under the stone. And because the stone sits slightly above the bathroom floor — usually by a few millimeters to create a lip — water gets trapped against the underside of the stone.
That trapped water has nowhere to go. It sits there, soaking into the adhesive, working its way under the tile, and slowly migrating into the subfloor. Over weeks and months, it causes the adhesive to break down, the tiles to lift, and the floor beneath to rot.
The fix is ridiculously simple. A bead of sealant along both edges of the threshold stone blocks water completely. It takes ten minutes. The damage it prevents costs thousands.
Not every sealant belongs on a bathroom threshold. The environment is brutal — constant foot traffic, water exposure, temperature changes. You need something tough.
Acrylic caulk on a threshold stone is a waste of money. It hardens over time, it shrinks as it cures, and it cracks under the constant movement of people walking over it. Within a few months, it pulls away from the stone and water goes right through.
100% silicone sealant stays permanently flexible. It bonds to stone, tile, and metal. It handles foot traffic, water splashing, and temperature swings without breaking down. This isn't a nice-to-have — it's the only option that actually works on a bathroom threshold.
Threshold stones move. Every time someone steps on them, there's a tiny flex. The building settles slightly. The stone expands and contracts with moisture. A rigid sealant will crack every time the stone shifts. Look for silicone labeled as "high movement capability" or "permanently flexible." These formulas stretch without breaking, which is exactly what a threshold joint needs.
White sealant on a dark threshold stone looks obvious. Colored sealant on a light stone draws the eye to the joint. Transparent silicone disappears into the gap. It seals the joint without looking like you tried to hide something. And if moisture or mold ever starts forming behind the stone, you can actually see it through the clear sealant instead of discovering it months later when the floor is already damaged.
This is a quick job, but doing it fast means doing it wrong. Take an extra ten minutes and do it properly.
Use a utility knife or a caulk remover tool to scrape away all the old sealant from both edges of the threshold. Get down to bare stone and bare tile. If there's mold on the surface, wipe it down with a diluted bleach solution, let it dry completely, then wipe again with clean water. You cannot seal over old caulk or mold. The new sealant won't stick, and you're just trapping the problem under a fresh layer.
This is the step everyone skips. And it's the reason most threshold seals fail within a year.
Wipe the stone edge with isopropyl alcohol to remove any grease or residue. Wipe the adjacent tile surface with the same. Let both surfaces air dry for at least 30 minutes. Any moisture left in the gap will prevent the silicone from bonding. I know it feels like overkill, but a dry surface is the difference between a seal that lasts five years and one that peels off in five months.
Apply masking tape along the stone edge and along the tile edge on both sides of the threshold. This gives you a perfectly clean, straight line. Press the tape down firmly so sealant doesn't seep underneath. When you peel the tape off after smoothing, you'll have a sharp professional-looking joint with no messy edges.
Cut the silicone tube tip at a 45-degree angle. For most threshold gaps, a 6mm to 8mm opening works well. The opening should match the width of the gap — not wider. A wider nozzle wastes sealant and creates a bulky bead that takes forever to cure. A narrower nozzle doesn't fill the joint properly.
Press the trigger and run a smooth, steady bead of silicone along the entire joint. Don't stop and restart. A continuous bead bonds better, looks cleaner, and has fewer weak points. Keep even pressure so the bead is consistent from start to finish. Do both sides of the threshold — the bathroom side and the hallway side.
You've got about 5 to 10 minutes before the silicone starts forming a skin. Use a wet finger or a plastic smoothing tool to press the sealant firmly into the gap. The goal is a smooth, slightly concave bead that sits flush with both the stone and the tile. This pushes the silicone deep into the joint, removes air pockets, and creates a watertight seal.
Wipe off excess with a damp cloth, then remove the masking tape while the sealant is still tacky. Peel slowly at an angle to avoid pulling the bead away from the edge.
Don't walk on it. Don't run water over it. Don't test it. Leave it alone for a full 24 hours minimum, ideally 48. Silicone needs time to cure fully, and disturbing it before that point compromises the entire bond.
Everyone knows to seal the top edges where the stone meets the tile. But there are other spots around the threshold that leak just as often.
This is the big one. The threshold stone sits on top of the subfloor, and where the bottom edge of the stone meets the subfloor, there's a gap that water seeps into constantly. Most installers never seal this spot because they can't see it. But water finds it every single time you shower.
Pull up the stone if you have to, or use a long, thin nozzle to reach underneath. Run a bead of silicone along the entire bottom edge where the stone meets the subfloor. It takes five minutes and it stops the most common source of threshold leaks.
The threshold stone doesn't just run side to side — it also meets the door frame at both ends. Those end joints are almost never sealed. Water runs along the floor and pools right at those ends. If there's no sealant, water works its way under the stone and into the wall cavity.
Run a bead of silicone along both ends where the threshold meets the door frame. Make sure the bead is continuous — no gaps, no breaks.
If your shower has a tray, the threshold stone usually butts up against the tray edge. That junction is a prime leak point. Water runs off the tray, hits the threshold, and finds the tiniest gap to escape through. Apply silicone along the entire length where the threshold meets the tray. It takes two minutes and it protects the tray edge for years.
I've seen so many good sealant jobs ruined by the same handful of errors. Avoid these and you'll be ahead of most people.
Applying sealant to a wet surface. It won't bond. Dry everything completely first.
Using acrylic or latex instead of silicone. Those products fail within weeks in a bathroom.
Not removing old sealant before applying new. The new stuff won't stick to the old stuff.
Not smoothing the bead. An unsmoothed bead traps air and moisture.
Testing the seal too soon. Walk on it before 24 hours and you're undoing your own work.
Skipping the underside of the threshold. This is where most leaks actually start.
Leaving gaps in the bead. Every millimeter of unsealed joint is an entry point for water.
The threshold stone is the gateway between your bathroom and the rest of your house. It's the first line of defense against water damage. Get the seal right once, and you won't be pulling up warped floors or replacing rotted subfloors down the road. It takes twenty minutes. The damage it prevents is priceless.
Copyright 2019 by Hangzhou Silicone Tech Adhesive Co., Ltd. All rights reserved.
Bathroom Sealant | Acrylic Sealant | Dow Corning 795 | Aquarium Sealant | Dow Corning 732 | Clear Silicone Sealant | Polysulfide Sealant | Glazing Sealant | Mirror Sealant | IG Sealant
Powered by Onepound


