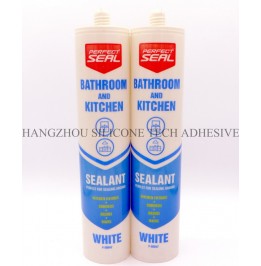
Post-Application Repair Techniques for Bathroom Sealants
Bathroom sealants are exposed to constant moisture, temperature fluctuations, and cleaning agents, making them prone to cracks, gaps, or discoloration over time. Prompt and effective repairs are essential to prevent water damage, mold growth, and structural deterioration. Below are step-by-step methods to address common sealant issues without compromising performance.

Before repairing, thoroughly inspect the sealant for signs of wear. Look for cracks, shrinkage, or separation from surfaces. Proper preparation ensures adhesion and longevity of the repair.
Cleaning the Affected Zone:
Use a non-abrasive cleaner and a soft brush to remove dirt, soap scum, or mildew from the damaged area. Rinse with water and dry completely with a lint-free cloth. Moisture trapped beneath the sealant can weaken the bond.
Removing Loose or Old Sealant:
Gently scrape away cracked or peeling sections with a plastic putty knife or a sealant removal tool. Avoid metal tools, which can scratch surfaces. For stubborn residue, apply a sealant softener and let it sit for 10–15 minutes before scraping.
Assessing Substrate Integrity:
Check for underlying issues like water damage or mold. If the substrate is compromised, address these problems before reapplying sealant. A stable base prevents future failures.
Once the area is prepped, apply new sealant with precision to ensure waterproofing and aesthetic consistency.
Cutting the Nozzle Correctly:
Trim the sealant tube’s nozzle at a 45-degree angle to match the width of the gap. A smaller opening provides better control for narrow seams, while a wider cut suits larger joints.
Using a Caulking Gun for Steady Application:
Load the sealant tube into a caulking gun and apply steady pressure to dispense a uniform bead. Move the gun smoothly along the joint, maintaining consistent speed to avoid uneven lines.
Tooling the Sealant:
After application, use a damp finger or a sealant-smoothing tool to shape the bead into a concave curve. This improves water runoff and creates a professional finish. Wipe the tool frequently to prevent sticking.
Curing time varies based on temperature and humidity. Follow these steps to optimize bonding and durability.
Maintaining Ideal Curing Conditions:
Keep the bathroom well-ventilated during curing. Use fans or open windows to reduce humidity, which can prolong drying. Avoid using the shower or sink for at least 24–48 hours, depending on the sealant type.
Protecting the Repair from Moisture:
Cover the repaired area with plastic sheeting or tape if water exposure is unavoidable during curing. This shields the sealant from premature contact with moisture, which can weaken adhesion.
Checking for Gaps After Curing:
Once fully cured, inspect the repair for shrinkage or missed spots. Apply additional sealant to any gaps and re-tool as needed. A second layer ensures complete coverage.
Addressing Recurring Mold Growth:
If mold reappears beneath the sealant, clean the area with a vinegar-water solution or a hydrogen peroxide-based cleaner. Let it dry thoroughly before reapplying sealant. Consider using a mold-resistant primer on the substrate.
Repairing Discolored Sealant:
For aesthetic issues like yellowing, lightly sand the discolored layer with fine-grit sandpaper. Clean the dust and apply a fresh coat of sealant. Match the color as closely as possible for a cohesive look.
Fixing Sealant in Tight Corners:
Use a flexible applicator or a syringe with a narrow tip to inject sealant into hard-to-reach corners. Press the sealant firmly into the joint to eliminate air pockets.
By following these techniques, you can restore the functionality and appearance of bathroom sealants. Regular maintenance, such as periodic cleaning and inspections, can extend the lifespan of repairs and prevent future issues.
Copyright 2019 by Hangzhou Silicone Tech Adhesive Co., Ltd. All rights reserved.
Bathroom Sealant | Acrylic Sealant | Dow Corning 795 | Aquarium Sealant | Dow Corning 732 | Clear Silicone Sealant | Polysulfide Sealant | Glazing Sealant | Mirror Sealant | IG Sealant
Powered by Onepound