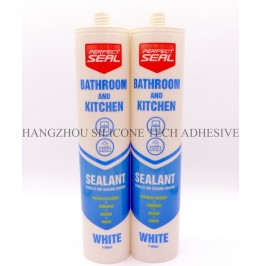
Preventing Color Changes in Sealants After Application: Key Strategies
Sealants are often chosen for their aesthetic compatibility with surfaces, but discoloration after application can undermine their visual appeal. Factors like UV exposure, chemical reactions, or improper curing can lead to unwanted shifts in hue. Below are actionable techniques to maintain consistent color integrity throughout the sealant’s lifespan.

Ultraviolet (UV) rays from sunlight or artificial lighting can degrade sealant pigments over time, causing fading or yellowing. This is particularly common in outdoor applications or areas with prolonged light exposure.
Surface Preparation for UV Resistance:
Ensure the substrate is clean and free of contaminants that might accelerate UV degradation. Dust, oils, or old sealant residues can create uneven exposure, leading to patchy discoloration.
Application Timing:
Schedule sealant application during periods of low UV intensity, such as early morning or late afternoon. Avoid working in direct midday sunlight, which can cause premature curing and uneven color development.
Protective Coatings:
For high-UV environments, consider applying a clear UV-resistant topcoat over the sealant. This barrier shields pigments from direct light exposure without altering the sealant’s texture or adhesion.
Sealants can react with substances in their environment, leading to discoloration or staining. Common culprits include cleaning agents, acids, or alkaline materials.
Neutralizing Substrate pH:
Test the substrate’s pH before application. Extremely acidic or alkaline surfaces can trigger chemical reactions with the sealant. Use a pH-neutralizing primer or cleaner to balance the surface.
Isolating Incompatible Materials:
If the sealant will contact metals, plastics, or other materials, ensure compatibility. Some metals, like copper, can leach into the sealant and cause greenish stains. Use physical barriers or compatible primers to prevent contact.
Ventilation During Curing:
Poor ventilation can trap volatile organic compounds (VOCs) near the sealant, leading to off-gassing that may discolor the surface. Work in well-ventilated areas or use fans to disperse fumes.
Incomplete or uneven curing can result in color inconsistencies, such as blotchiness or a dull finish. Temperature and humidity play critical roles in this process.
Temperature Control:
Sealants cure best within specific temperature ranges, typically between 50°F and 90°F (10°C to 32°C). Extreme cold slows curing, while excessive heat can cause rapid drying and uneven color. Use space heaters or fans to regulate ambient conditions.
Humidity Management:
High humidity can prolong curing times, leading to a milky or hazy appearance. Conversely, low humidity may cause the sealant to dry too quickly, trapping moisture beneath the surface. Aim for a relative humidity of 40–60% during application.
Uniform Application Techniques:
Apply sealant in consistent layers to avoid thick spots that cure slower than thinner areas. Use a steady hand or guided tools to maintain even bead thickness, ensuring uniform color development.
Testing in Inconspicuous Areas:
Before full application, test the sealant on a small, hidden section of the substrate. Monitor for color changes over 24–48 hours to identify potential reactions or incompatibilities.
Avoiding Over-Tooling:
Excessive smoothing or reworking of the sealant can introduce air bubbles or uneven surfaces, which may appear as discolored patches once cured. Use minimal tooling to achieve a smooth finish.
Post-Application Cleaning:
Residue from tooling or accidental smears can dry into the sealant, causing streaks or stains. Clean tools frequently during application and wipe away excess material immediately with a damp, lint-free cloth.
By prioritizing UV protection, chemical compatibility, and controlled curing, you can significantly reduce the risk of post-application color changes. Always tailor your approach to the specific environment and substrate to ensure lasting aesthetic consistency.
Copyright 2019 by Hangzhou Silicone Tech Adhesive Co., Ltd. All rights reserved.
Bathroom Sealant | Acrylic Sealant | Dow Corning 795 | Aquarium Sealant | Dow Corning 732 | Clear Silicone Sealant | Polysulfide Sealant | Glazing Sealant | Mirror Sealant | IG Sealant
Powered by Onepound