E-mail:
sales@silicone-sealant-china.com
When installing or renovating a glass shower enclosure, applying sealant correctly is crucial for ensuring waterproofing, preventing leaks, and maintaining the structural integrity of the entire setup. A well-executed sealant job not only keeps water from seeping into unwanted areas but also enhances the aesthetic appeal of your bathroom. Here’s a step-by-step guide to applying sealant around a glass shower enclosure, covering everything from preparation to finishing touches.
Before you begin applying sealant, thorough preparation of both the work area and the materials you’ll use is essential. This step sets the foundation for a successful and long-lasting sealant application.
Start by cleaning all surfaces where the sealant will be applied. This includes the glass panels, the shower tray or base, and any adjacent walls or tiles. Use a mild detergent solution and a soft cloth or sponge to remove dirt, soap scum, and any existing sealant residue. For stubborn stains or old sealant, you may need to use a non-abrasive scraper or a specialized sealant remover. Rinse the surfaces thoroughly with clean water and allow them to dry completely. Moisture can prevent the sealant from adhering properly, leading to potential leaks down the line.
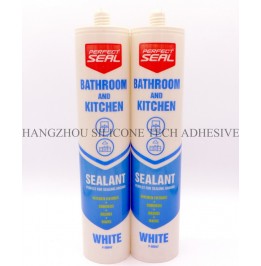
Choosing the appropriate sealant for your glass shower enclosure is vital. Look for a sealant that’s specifically designed for bathroom or wet-area applications, as these are formulated to withstand constant exposure to moisture and humidity. Silicone-based sealants are a popular choice for shower enclosures due to their flexibility, waterproofing properties, and resistance to mold and mildew growth. Ensure the sealant you select is compatible with both the glass and the material of the shower tray or adjacent surfaces, such as ceramic tiles or acrylic.
Equip yourself with the right tools to make the sealant application process smooth and efficient. You’ll need a high-quality caulking gun for precise dispensing of the sealant, a utility knife or scissors to cut the sealant tube nozzle, and a caulking smoothing tool or a wet finger for shaping the sealant bead. Additionally, have some masking tape on hand to create clean, straight edges along the sealant lines, and a roll of paper towels or rags for cleaning up any excess sealant during the application.
With the work area prepared and your materials ready, it’s time to apply the sealant. Follow these steps carefully to achieve a professional-looking and effective seal.
To create sharp, clean edges along the sealant lines, apply masking tape on both sides of the joint where the sealant will be applied. This technique helps prevent the sealant from spreading onto unwanted areas and makes the cleanup process much easier. Position the tape about 1/8 inch away from the joint on each side, ensuring it’s straight and firmly adhered to the surface.
Using a utility knife or scissors, cut the nozzle of the sealant tube at a 45-degree angle. The size of the opening you create will determine the width of the sealant bead, so adjust it according to the size of the joint you’re sealing. For most glass shower enclosure joints, a 1/4-inch opening is a good starting point, but you may need to adjust it slightly based on the specific requirements of your project.
Insert the sealant tube into the caulking gun, ensuring it’s securely in place. Squeeze the trigger gently to start the flow of sealant, and then apply a steady, continuous bead along the joint, starting from one end and working your way to the other. Keep the nozzle at a consistent angle and maintain a steady pressure on the trigger to ensure an even bead width throughout. As you apply the sealant, move the caulking gun smoothly along the joint, avoiding stops and starts that could create uneven sections.
Once you’ve applied the sealant bead, use a caulking smoothing tool or a wet finger to shape the sealant into a neat, concave profile. This not only improves the appearance of the sealant but also helps it perform better by directing water away from the joint. Dip your finger or the smoothing tool in a bowl of water or a solution of water and a few drops of dish soap to prevent the sealant from sticking. Gently run the tool or your finger along the bead, applying light pressure to create a smooth, even surface.
After applying the sealant, proper care and maintenance are essential to ensure its longevity and effectiveness. Here’s what you need to do to keep your glass shower enclosure sealant in top condition.
One of the most critical steps after applying sealant is allowing it to cure completely before exposing it to water or heavy use. The curing time can vary depending on the type of sealant used, environmental conditions such as temperature and humidity, and the thickness of the sealant bead. Typically, silicone-based sealants take anywhere from 24 to 72 hours to cure fully. During this time, avoid using the shower or getting the sealant wet, as this can interfere with the curing process and compromise the seal’s integrity.
To maintain the appearance and performance of your glass shower enclosure sealant, incorporate regular cleaning into your bathroom maintenance routine. Use a mild, non-abrasive cleaner and a soft cloth or sponge to clean the sealant lines, removing any dirt, soap scum, or mildew that may have accumulated. Avoid using harsh chemicals or abrasive scrubbers, as these can damage the sealant surface. Additionally, periodically inspect the sealant for signs of wear, cracking, or peeling. If you notice any issues, address them promptly by removing the old sealant and reapplying a fresh bead to prevent leaks and further damage.
Over time, even the best-applied sealant may develop issues such as discoloration, mold growth, or loss of adhesion. If you encounter these problems, there are steps you can take to restore the sealant’s performance. For minor discoloration or mildew, use a specialized sealant cleaner or a solution of bleach and water to clean the affected area. For more severe issues, such as cracking or peeling, you’ll need to remove the old sealant completely using a sealant remover or a non-abrasive scraper. Once the area is clean and dry, reapply a fresh bead of sealant following the same application steps outlined above. Regular maintenance and timely repairs can significantly extend the lifespan of your glass shower enclosure sealant, keeping your bathroom waterproof and looking great for years to come.
Copyright 2019 by Hangzhou Silicone Tech Adhesive Co., Ltd. All rights reserved.
Bathroom Sealant | Acrylic Sealant | Dow Corning 795 | Aquarium Sealant | Dow Corning 732 | Clear Silicone Sealant | Polysulfide Sealant | Glazing Sealant | Mirror Sealant | IG Sealant
Powered by Onepound


