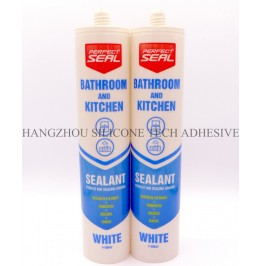
Managing humidity levels before sealant curing is essential to ensure proper adhesion, prevent defects, and maintain long-term performance. Excessive moisture can disrupt chemical reactions during curing, leading to weak bonds, bubbling, or discoloration. Understanding the critical thresholds and implementing effective control strategies is vital for both residential and commercial projects.

High humidity environments introduce excess water vapor into the air, which can interfere with the curing process of many sealants. For moisture-curing sealants, such as silicone or polyurethane variants, ambient moisture is necessary for cross-linking. However, excessive humidity can overwhelm the system, causing uneven curing or a sticky surface. In solvent-based sealants, high moisture levels may slow evaporation, trapping solvents and leading to prolonged softness.
Surface condensation is another risk. When warm, humid air contacts cooler substrates, water droplets form, creating a barrier between the sealant and the material. This prevents proper adhesion, resulting in peeling or reduced durability. Additionally, elevated humidity can promote mold and mildew growth within uncured sealant, compromising hygiene and structural integrity over time.
Studies indicate that humidity levels above 70% relative humidity (RH) significantly increase the likelihood of curing issues. At these levels, water absorption by the sealant may outpace the curing rate, leading to inconsistent hardness and compromised mechanical properties.
The acceptable humidity range varies depending on the sealant chemistry. For silicone-based sealants, which rely on atmospheric moisture for curing, the optimal range is typically between 40% and 60% RH. Exceeding 70% RH may cause surface tackiness or delayed full curing, while levels below 30% RH can slow the reaction, extending drying times.
Polyurethane sealants, which cure through a combination of moisture and chemical reactions, perform best at 50–65% RH. Humidity above 75% RH can lead to foaming or bubbling, especially in thick applications. Conversely, acrylic sealants, often used in interior projects, tolerate a broader range but still function optimally below 70% RH to avoid prolonged drying and potential adhesion failures.
In environments with consistently high humidity, such as bathrooms or coastal areas, special precautions are necessary. Using dehumidifiers or scheduling applications during drier seasons can mitigate risks. For critical projects, monitoring devices like hygrometers provide real-time data to adjust workflows accordingly.
Pre-application humidity management begins with environmental assessments. Check weather forecasts to avoid rainy or humid days, and use hygrometers to measure indoor RH. If levels exceed the recommended threshold, deploy dehumidifiers to reduce moisture content. Portable units with adjustable settings are effective for small spaces, while larger projects may require industrial-grade systems.
Ventilation adjustments also play a role. In enclosed areas, increasing airflow with fans can help lower humidity, but ensure the air is dry. Avoid using humidifiers or opening windows in damp conditions. For exterior applications, shield work areas from rain or dew using temporary covers, and schedule work during midday when humidity is typically lower.
Substrate preparation is equally important. Clean surfaces thoroughly to remove dust, oils, or existing moisture. Allow materials like concrete or wood to acclimate to the environment for 24–48 hours before sealing. Using primers designed for high-humidity conditions can enhance adhesion and create a barrier against moisture penetration.
Continuous humidity monitoring during the curing period ensures the sealant remains within safe limits. Digital hygrometers placed near the application site provide accurate readings. If humidity spikes unexpectedly, take immediate action, such as activating dehumidifiers or pausing work until conditions stabilize.
For projects in unpredictable climates, consider using sealants formulated for high-humidity environments. These products often contain additives that resist moisture interference, though they still require adherence to general humidity guidelines. In extreme cases, rescheduling the application to a drier season or relocating work to a controlled indoor space may be necessary.
Documentation of humidity levels throughout the process is valuable for quality control. Recording RH values at application and during curing helps identify patterns and troubleshoot issues if performance problems arise later. This proactive approach minimizes rework and ensures compliance with industry standards.
By prioritizing humidity control before and during sealant curing, professionals and DIY enthusiasts alike can achieve reliable, durable results. Combining environmental management, material selection, and real-time monitoring creates optimal conditions for successful sealant applications.
Copyright 2019 by Hangzhou Silicone Tech Adhesive Co., Ltd. All rights reserved.
Bathroom Sealant | Acrylic Sealant | Dow Corning 795 | Aquarium Sealant | Dow Corning 732 | Clear Silicone Sealant | Polysulfide Sealant | Glazing Sealant | Mirror Sealant | IG Sealant
Powered by Onepound