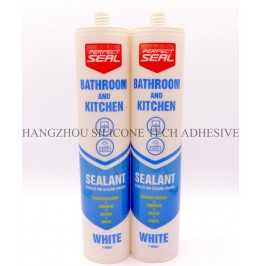
Bathroom sealants are critical for preventing water infiltration and maintaining structural integrity in high-moisture environments. However, their performance can be significantly affected by structural settlement, a natural phenomenon caused by soil movement, foundation shifts, or thermal expansion. Understanding these impacts and implementing preventive measures ensures long-lasting protection for bathroom fixtures and subfloors.

Structural settlement creates stress on sealant joints by altering the alignment of connected surfaces. When walls, floors, or fixtures shift due to settlement, the sealant must stretch or compress to accommodate movement. If the settlement exceeds the sealant’s elasticity, it may crack, tear, or detach from the substrate.
For example, in bathrooms with tiled floors, settlement can cause adjacent tiles to move vertically or horizontally. This movement creates gaps at the joints between tiles and fixtures like bathtubs or sinks, compromising the sealant’s ability to block water. Over time, even minor cracks can allow moisture to penetrate, leading to mold growth, rot, or structural damage to underlying materials.
Joint Expansion and Contraction
Bathroom sealants are often applied to joints between tiles, walls, and fixtures. Structural settlement can cause these joints to widen or narrow unpredictably. If the sealant lacks sufficient flexibility, it may fail to bridge the gap, resulting in leaks.
Adhesion Loss
Settlement can weaken the bond between the sealant and the substrate. For instance, if a wall tilts slightly due to foundation movement, the sealant along the baseboard may peel away, creating entry points for water.
Thermal Stress Amplification
Temperature fluctuations in bathrooms (e.g., from hot showers) already cause materials to expand and contract. Structural settlement exacerbates this stress, accelerating sealant degradation.
To minimize the risk of sealant failure due to structural settlement, proper installation techniques and material selection are essential.
Not all sealants are equally resistant to settlement-induced stress. Opt for products specifically designed for high-movement applications, such as those with:
Surface Preparation
Clean the substrate thoroughly to remove dirt, grease, or old sealant residue. A roughened surface improves adhesion, reducing the likelihood of detachment during settlement.
Backer Rod Usage
For gaps deeper than ½ inch, use a backer rod before applying sealant. This filler material reduces the amount of sealant needed and provides a stable base, preventing sagging or cracking.
Tooling for a Smooth Finish
After applying the sealant, use a wet finger or a caulking tool to shape it into a concave bead. This ensures even coverage and enhances the sealant’s ability to flex without tearing.
Allowing Adequate Curing Time
Follow the manufacturer’s instructions for drying and curing. Avoid using the bathroom until the sealant is fully cured, as premature exposure to moisture or movement can compromise its integrity.
Regular inspections and maintenance can extend the lifespan of bathroom sealants, even in areas prone to settlement.
Check sealant joints annually for signs of cracking, peeling, or discoloration. Pay close attention to high-stress areas, such as corners, edges, and joints near fixtures.
If you notice small cracks or gaps, repair them immediately to prevent water infiltration. Remove the damaged sealant, clean the area, and reapply a fresh bead using the same techniques as during initial installation.
By understanding the impact of structural settlement on bathroom sealants and implementing proactive measures, homeowners and contractors can ensure durable, waterproof protection for years to come.
Copyright 2019 by Hangzhou Silicone Tech Adhesive Co., Ltd. All rights reserved.
Bathroom Sealant | Acrylic Sealant | Dow Corning 795 | Aquarium Sealant | Dow Corning 732 | Clear Silicone Sealant | Polysulfide Sealant | Glazing Sealant | Mirror Sealant | IG Sealant
Powered by Onepound