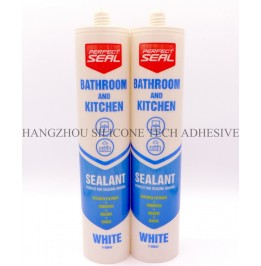
Protecting Bathroom Sealant for 24 Hours After Application
Bathroom sealant requires careful handling during the first 24 hours after application to ensure proper curing and long-term durability. This critical period determines whether the sealant forms a strong, waterproof bond or develops weaknesses that lead to leaks, mold, or premature cracking. Even minor disturbances during curing can compromise adhesion, especially in high-moisture environments like bathrooms. Understanding how to shield fresh sealant from physical, environmental, and chemical risks ensures a flawless finish that withstands daily use.

The first step in protecting newly applied sealant is minimizing physical contact. Avoid touching, pressing, or leaning on the sealant during the initial 24 hours, as this can displace the material or create indentations that trap water. For high-traffic areas like shower floors or bathtub edges, use temporary barriers such as cardboard, plastic sheeting, or caution tape to block access. Secure these barriers with painter’s tape along the edges of fixtures or tiles, ensuring they don’t shift and damage the sealant.
In shared bathrooms, communicate clearly with household members about the curing timeline. Place visible signs near the sealed area or close the bathroom door to prevent accidental contact. If the sealant is applied around sinks or countertops, avoid placing toiletries, cleaning supplies, or heavy objects on the surface until the curing period ends. Even light pressure from a bottle or brush can deform the material before it hardens.
For vertical surfaces like shower walls or backsplashes, check the sealant periodically during the first few hours to ensure it isn’t sagging or dripping. If gravity causes the material to shift, gently reposition it with a dampened finger or plastic spatula before it fully cures. This is particularly important in humid bathrooms, where slower evaporation might extend the “tacky” phase of curing.
Bathrooms are inherently moist environments, and excess humidity during curing can weaken sealant adhesion or prolong drying times. To protect fresh sealant, avoid using the shower, bathtub, or sink for at least 24 hours after application. Running water creates steam and splashes that settle on surfaces, introducing moisture the sealant isn’t yet equipped to repel. If you must use the bathroom, limit activities to dry tasks like brushing teeth or applying makeup, and wipe down any condensation immediately.
Ventilation plays a dual role in moisture control. While proper airflow helps dissipate fumes from fresh sealant, excessive drafts can slow curing by carrying dust or debris onto the surface. Keep bathroom windows and doors closed during the first 12–18 hours, especially if the space is humid. After this period, open windows slightly to encourage gentle airflow, but avoid creating strong drafts that might chill the sealant or dry it unevenly.
If the bathroom lacks windows, use a portable fan set to low speed to circulate air without directing it at the sealant. Position the fan near the doorway or an exhaust vent to pull moist air out of the room. For persistent humidity, run a dehumidifier on a moderate setting to reduce ambient moisture levels. Empty the dehumidifier’s reservoir regularly to prevent overflow, and monitor the room with a hygrometer to ensure humidity stays below 60% during curing.
Fresh sealant is vulnerable to chemical reactions that can weaken its structure or discolor its surface. During the first 24 hours, avoid using cleaning products, solvents, or even water-based solutions near the sealed area. Many household cleaners contain ammonia, bleach, or acids that react with uncured sealant, causing discoloration, softening, or bubbling. If spills occur, blot them immediately with a dry cloth and avoid wiping, which could spread the substance.
Personal care products like shampoo, body wash, or lotions also pose risks. These items often contain oils, fragrances, or alcohols that interfere with curing, especially if they come into contact with the sealant before it hardens. Encourage household members to store toiletries away from the sealed area and to use alternative sinks or showers if possible. If a product accidentally touches the sealant, rinse the area gently with clean water (if the sealant is water-resistant) and pat it dry with a towel.
For bathrooms with hard water stains or mineral deposits, avoid using vinegar or citrus-based cleaners during curing, as their acidic nature can etch or degrade the sealant. Even natural remedies like baking soda and water should be postponed until the 24-hour mark, as their abrasive texture might scratch the surface before it’s fully cured. Stick to dry dusting or gentle brushing for any nearby surfaces during this period.
By prioritizing physical protection, moisture control, and chemical avoidance, you can safeguard bathroom sealant during its most vulnerable stage. These measures ensure the material cures evenly, forming a resilient barrier that prevents water damage and maintains a clean, professional appearance for years to come.
Copyright 2019 by Hangzhou Silicone Tech Adhesive Co., Ltd. All rights reserved.
Bathroom Sealant | Acrylic Sealant | Dow Corning 795 | Aquarium Sealant | Dow Corning 732 | Clear Silicone Sealant | Polysulfide Sealant | Glazing Sealant | Mirror Sealant | IG Sealant
Powered by Onepound