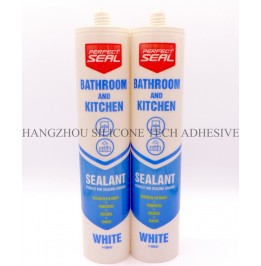
Enhancing Sealant Adhesion on Different Surface Materials
Achieving strong adhesion between sealants and diverse surface materials is essential for ensuring long-lasting, leak-proof seals in bathrooms, kitchens, and other high-moisture areas. Poor adhesion leads to peeling, cracking, or water infiltration, compromising both functionality and aesthetics. Understanding how to adapt preparation and application techniques to specific materials—such as ceramic tiles, glass, metal, or natural stone—can significantly improve sealant performance. Here’s how to tackle adhesion challenges across common substrates.

Porous materials like natural stone, unglazed tiles, or concrete absorb moisture and contaminants, which can weaken sealant bonds. Start by thoroughly cleaning the surface with a pH-neutral cleaner to remove dirt, oils, or soap residue. Avoid acidic or abrasive cleaners, as they may etch or damage the material. After cleaning, rinse the area with water and dry it completely using a lint-free cloth or air blower.
For highly absorbent surfaces, apply a primer designed to seal pores and create a uniform base for the sealant. Primers act as a bonding agent, filling microscopic gaps and preventing the sealant from sinking too deeply into the material. Use a brush or roller to apply the primer in thin, even coats, covering the entire joint area. Allow the primer to cure according to the manufacturer’s instructions—typically 1–2 hours—before proceeding with sealant application.
If the surface has visible cracks or uneven spots, repair them with a waterproof filler or epoxy compound. Smooth the filler flush with the surrounding material using a putty knife, then sand lightly to create a seamless transition. This step ensures the sealant adheres to a stable, level surface, reducing the risk of detachment over time.
Non-porous materials like glass, glazed ceramic tiles, or stainless steel resist moisture but often have smooth, slick finishes that hinder sealant adhesion. Begin by cleaning the surface with isopropyl alcohol or a dedicated degreaser to eliminate oils, fingerprints, or silicone residues. These contaminants create a barrier between the sealant and substrate, leading to poor bonding.
After cleaning, roughen the surface slightly to improve mechanical adhesion. For glass or metal, use fine-grit sandpaper (220–400 grit) to create subtle scratches without damaging the material. Wipe away dust with a damp cloth, then dry the area thoroughly. For glazed tiles, avoid abrasive methods that might scratch the glaze; instead, use a clean rag dampened with alcohol to ensure a residue-free finish.
In some cases, applying an adhesion promoter or bonding agent can enhance grip on non-porous surfaces. These products chemically react with the sealant and substrate, creating a stronger bond. Follow the manufacturer’s guidelines for application, typically using a brush or spray to coat the joint area lightly. Allow the promoter to dry for 10–15 minutes before applying sealant, as premature curing can reduce effectiveness.
When sealing joints between dissimilar materials—such as tile and metal, or stone and glass—adhesion challenges multiply due to differing thermal expansion rates or surface textures. To address this, focus on creating a gradual transition zone where the sealant can adapt to both materials.
Start by masking the edges of both surfaces with painter’s tape, leaving a 3–5mm gap for the sealant. This defines the joint line and prevents overspill onto adjacent areas. Clean both surfaces thoroughly, as described earlier, paying special attention to the junction where they meet.
For mixed substrates, consider using a backer rod—a flexible foam strip—to control sealant depth and improve adhesion. Insert the backer rod into the joint, pressing it firmly against the bottom to create a consistent cavity for the sealant. This technique prevents the sealant from bonding to all three sides of the joint (a common cause of cracking), while also providing a surface for the sealant to grip.
When applying the sealant, use a caulking gun to fill the joint evenly, then tool it into a concave shape with a damp finger or plastic spatula. The curved profile reduces stress on the sealant as the materials expand or contract, minimizing the risk of detachment. For extra reinforcement, some professionals apply a thin layer of sealant to each substrate separately, allowing it to partially cure before joining them with a fresh bead—a method known as “stitching” the seal.
Temperature and humidity play critical roles in sealant adhesion, regardless of the substrate. Apply sealant in moderate conditions—ideally between 50–80°F (10–27°C)—to ensure proper curing. Extreme cold slows the process, while excessive heat can cause the sealant to skin over too quickly, making tooling difficult. Similarly, high humidity may prolong drying times, leading to inconsistent results.
The thickness of the sealant bead also affects adhesion. Overly thick layers take longer to cure and are more prone to shrinking or cracking, while beads that are too thin may not provide adequate coverage. Aim for a consistent width of 3–6mm, adjusting based on the joint’s depth and the manufacturer’s recommendations.
Finally, avoid disturbing the sealed area during curing. Even gentle pressure or vibrations can disrupt the bond, especially in the first 24–48 hours. Keep the space well-ventilated to accelerate drying, but shield the joint from direct sunlight or drafts, which can cause uneven curing.
By tailoring surface preparation, application methods, and environmental controls to the specific properties of each material, you can significantly enhance sealant adhesion. Whether working with porous stone, slick glass, or mixed substrates, these strategies ensure durable, watertight seals that withstand daily use and environmental stressors.
Copyright 2019 by Hangzhou Silicone Tech Adhesive Co., Ltd. All rights reserved.
Bathroom Sealant | Acrylic Sealant | Dow Corning 795 | Aquarium Sealant | Dow Corning 732 | Clear Silicone Sealant | Polysulfide Sealant | Glazing Sealant | Mirror Sealant | IG Sealant
Powered by Onepound