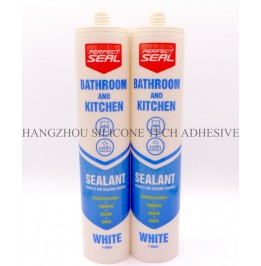
Mastering Sealant Application: Essential Techniques for Optimal Grip and Angle Control
Sealant application demands precision, and mastering the grip and angle of your caulking gun is critical to achieving professional-grade results. Whether sealing windows, joints, or curved surfaces, the way you handle the tool directly impacts adhesion, durability, and aesthetics. Below, we explore proven techniques to refine your approach.

A steady hand begins with a balanced grip. Hold the caulking gun with your dominant hand, wrapping your fingers around the trigger and handle for firm control. Place your non-dominant hand on the barrel’s base or the side of the gun to stabilize movement. This dual-handed approach minimizes wobbling, especially during long or intricate seams.
For vertical seams, lean slightly into the surface to counteract gravity’s pull. When working overhead, adjust your stance to maintain an upright posture, reducing fatigue. Consistency in pressure and motion ensures even bead distribution, preventing gaps or uneven thickness.
The angle of the caulking gun relative to the seam dictates how well the sealant adheres and fills the gap.
Narrow Seams (e.g., Window Frames):
Tilt the gun at a 45-degree angle to the surface. This sharper angle forces the sealant deeper into the joint, ensuring full contact with both edges. Move the gun slowly to avoid air pockets, which are common in tight spaces.
Wide Seams (e.g., Baseboards or Floor Joints):
Increase the angle to 60 degrees to allow the sealant to spread more broadly. This wider angle helps the material flow evenly across the gap, reducing the need for multiple passes.
Curved or Irregular Surfaces (e.g., Sinks or Bathtubs):
Adjust the angle dynamically as you move. For convex curves, reduce the angle slightly to maintain pressure on the outer edge. For concave curves, increase it to ensure the sealant reaches the center. Practice on scrap materials to gauge the ideal tilt for each contour.
Smooth, uniform motion is the hallmark of a flawless seal. Begin by squeezing the trigger gently to start the flow, then maintain steady pressure as you guide the gun along the seam. Avoid sudden starts or stops, which create blobs or breaks in the bead.
Straight Seams:
Move the gun at a consistent pace, matching the speed to the sealant’s flow rate. If the bead thickens, slow down; if it thins, speed up slightly.
Corners and Transitions:
Pause briefly at corners to ensure full coverage, then pivot the gun smoothly to continue the line. For inside corners, tilt the gun slightly inward to fill the gap. For outside corners, angle it outward to create a clean edge.
Interruptions and Resumption:
If you pause mid-seam, release the trigger and lift the gun slightly. To resume, press the trigger lightly to restart the flow before continuing. This prevents excess material from accumulating at the restart point.
Deep or Uneven Seams:
Layer the sealant in two passes. First, apply a thin base layer at a lower angle to fill the depth. After partial curing, add a second layer at a steeper angle to smooth the surface.
High-Temperature Environments:
Cool the sealant tube in a refrigerator for 10–15 minutes before use. This slows the curing process, giving you more time to work without the material hardening prematurely.
Vertical or Overhead Seams:
Use a slower-curing sealant and work in small sections. Apply from the bottom up, allowing each segment to skin over slightly before moving higher. This reduces sagging.
By refining your grip, adjusting angles for different seams, and mastering motion control, you can elevate your sealant application from amateur to professional. Practice on non-critical surfaces first, and observe how slight tweaks in technique impact the final result. With patience, even complex projects become manageable.
Copyright 2019 by Hangzhou Silicone Tech Adhesive Co., Ltd. All rights reserved.
Bathroom Sealant | Acrylic Sealant | Dow Corning 795 | Aquarium Sealant | Dow Corning 732 | Clear Silicone Sealant | Polysulfide Sealant | Glazing Sealant | Mirror Sealant | IG Sealant
Powered by Onepound