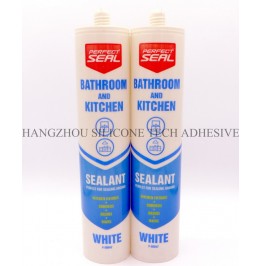
Surface Dryness Requirements Before Applying Bathroom Sealant
Proper surface preparation is critical for ensuring strong adhesion and long-term performance of bathroom sealants. Moisture trapped beneath or within substrates can compromise bonding, leading to peeling, mold growth, or water infiltration. Understanding and adhering to surface dryness standards minimizes these risks.

The type of substrate determines the acceptable moisture content before sealant application. Porous materials like drywall, concrete, and tile grout absorb water differently than non-porous surfaces such as glass or metal.
For drywall, moisture content should not exceed 12% as measured by a pinless moisture meter. Higher levels indicate residual humidity from recent construction or leaks, which can weaken adhesive bonds. Concrete substrates require even stricter controls, with moisture levels below 4% to prevent vapor pressure from pushing the sealant away.
Tile and grout surfaces must be visually and tactilely dry. Run a finger over the grout lines; if dampness or a darkened appearance persists, the area is not ready for sealing. Non-porous surfaces like ceramic tiles or shower trays should be wiped clean and left to air-dry for at least 24 hours after cleaning.
Accurate moisture testing prevents premature sealant failure. For porous materials, use a pin-type moisture meter inserted into the substrate at multiple points. Focus on corners, joints, and areas near plumbing fixtures, as these often retain hidden moisture.
Visual inspections complement instrumental testing. Look for condensation on surfaces, especially in poorly ventilated bathrooms. Use a bright light to check for darkened patches on drywall or grout, which indicate trapped water.
The “plastic sheet test” is a simple method for concrete floors. Tape a clear plastic sheet to the surface and leave it for 24 hours. If condensation forms beneath the sheet or the substrate appears darker, it is still too damp. Repeat the test until no moisture accumulates.
Ambient conditions significantly affect how quickly surfaces dry. High humidity levels, common in bathrooms, slow evaporation rates. Use dehumidifiers or improve ventilation by opening windows or running exhaust fans to accelerate drying.
Temperature also plays a role. Cold environments reduce molecular activity, slowing moisture evaporation. Ideally, maintain room temperatures between 18°C and 25°C during preparation. Avoid sealing surfaces in temperatures below 10°C, as low temperatures can cause sealants to cure improperly.
Airflow is another critical factor. Still air traps humidity near surfaces, while consistent ventilation promotes even drying. Position fans to circulate air without blowing directly onto wet substrates, which could create uneven moisture distribution.
Corners, edges, and recessed areas often retain moisture longer than flat surfaces. Use compressed air or a hairdryer on a cool setting to dislodge trapped water in grout lines or joint cavities. Avoid heat settings, as excessive warmth can damage delicate substrates.
For persistent dampness, apply a moisture-absorbing agent like silica gel packs or desiccant powders in enclosed spaces. Leave these in place for several hours before wiping the area clean. Ensure no residue remains, as it could interfere with sealant adhesion.
In cases of severe water damage, such as flooding or prolonged leaks, consult a professional to assess structural integrity. Replacing compromised drywall or subflooring may be necessary before resealing.
By prioritizing thorough surface dryness checks and addressing environmental variables, installers ensure optimal conditions for sealant application. This reduces the likelihood of adhesion failures, mold growth, and costly repairs down the line.
Copyright 2019 by Hangzhou Silicone Tech Adhesive Co., Ltd. All rights reserved.
Bathroom Sealant | Acrylic Sealant | Dow Corning 795 | Aquarium Sealant | Dow Corning 732 | Clear Silicone Sealant | Polysulfide Sealant | Glazing Sealant | Mirror Sealant | IG Sealant
Powered by Onepound