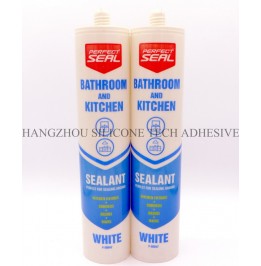
Sealants are widely used in construction, automotive, and industrial projects to create durable, watertight seals. However, even with careful handling, surface scratches can occur during or after application, compromising aesthetics and potentially reducing performance. Below are detailed techniques for addressing and repairing scratches on sealed surfaces without compromising the integrity of the material.

Before attempting repairs, it’s essential to evaluate the depth and type of damage. Scratches vary from superficial marks that only affect the outer layer to deeper gouges that penetrate the sealant’s core.
Shallow scratches typically appear as fine lines or minor discolorations on the surface. These marks often result from abrasive contact with tools, debris, or cleaning equipment. Deep scratches, on the other hand, create noticeable grooves that may expose underlying substrates or compromise the seal’s waterproofing capabilities. Testing the scratch with a fingernail can help determine its severity: if the nail catches, the scratch is likely deep enough to require more than cosmetic repair.
While shallow scratches may not affect the sealant’s functional properties, deeper ones can create pathways for moisture, chemicals, or dirt to infiltrate. This is particularly critical in areas exposed to water, such as bathrooms, kitchens, or exterior joints. If the scratch compromises the seal’s integrity, repairs should prioritize restoring both appearance and performance.
For shallow scratches that don’t penetrate the sealant’s protective layer, simple polishing or buffing methods can restore a smooth finish.
Using a soft cloth or microfiber pad, apply a small amount of fine-grit polishing compound (such as a ceramic or silicone-based paste) to the scratched area. Gently rub in circular motions, gradually increasing pressure until the scratch fades. This method works best on hard, glossy sealants and requires patience to avoid over-polishing, which can create uneven textures.
For minor surface blemishes, a damp microfiber cloth can sometimes suffice. Dampen the cloth slightly and rub the scratched area in a back-and-forth motion. The cloth’s fine fibers help redistribute the sealant’s surface material, filling in shallow scratches over time. This approach is non-invasive and ideal for quick touch-ups on visible but non-critical areas.
If polishing doesn’t fully eliminate the scratch, a thin application of clear, compatible sealant can act as a filler. Use a small brush or applicator to apply a minimal amount of sealant directly into the scratch, ensuring it blends seamlessly with the surrounding surface. Allow the sealant to cure according to the manufacturer’s instructions before lightly sanding or buffing to achieve a uniform finish.
Deeper scratches that penetrate the sealant’s body require more intensive repairs to restore both structural integrity and appearance.
For gouges or wide scratches, select a sealant that matches the original material in composition and color. Clean the damaged area thoroughly to remove debris, then apply the sealant using a caulking gun or small spatula. Press the material firmly into the scratch, ensuring it fills the void completely. Smooth the surface with a damp finger or tool before the sealant cures to create a seamless transition.
After the sealant has cured, use fine-grit sandpaper (e.g., 400–600 grit) to level the repaired section with the surrounding surface. Sand in a circular or back-and-forth motion, checking frequently to avoid over-sanding. Wipe away dust with a clean cloth, then apply a polishing compound if needed to restore shine.
In cases where the repaired area remains noticeably different in texture or color, consider applying a thin, uniform coat of sealant over the entire joint or surface. This approach ensures consistency and masks any lingering imperfections. Use a spray or brush-on application method, depending on the sealant type, and follow curing guidelines precisely.
While repairs are possible, preventing damage in the first place extends the sealant’s lifespan and reduces maintenance efforts.
During application, shield freshly sealed surfaces from foot traffic, tools, or debris by covering them with plastic sheeting or adhesive protective films. These barriers prevent accidental scratches while the sealant cures and hardens.
After curing, clean sealed surfaces with soft brushes, sponges, or non-abrasive cloths. Avoid steel wool, rough scrub pads, or harsh chemicals, which can scratch or degrade the sealant over time.
Periodically inspect sealed joints for signs of wear, such as fading, cracking, or new scratches. Address minor issues promptly to prevent them from worsening. Light touch-ups with polish or clear sealant can maintain the surface’s appearance and functionality.
By understanding the nature of scratches, employing appropriate repair techniques, and taking preventive measures, sealed surfaces can remain durable and visually appealing for years. Always consult the sealant manufacturer’s guidelines for material-specific recommendations.
Copyright 2019 by Hangzhou Silicone Tech Adhesive Co., Ltd. All rights reserved.
Bathroom Sealant | Acrylic Sealant | Dow Corning 795 | Aquarium Sealant | Dow Corning 732 | Clear Silicone Sealant | Polysulfide Sealant | Glazing Sealant | Mirror Sealant | IG Sealant
Powered by Onepound