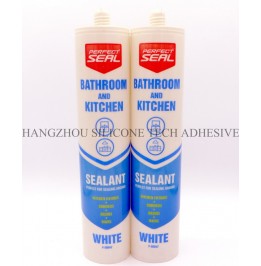
When placing furniture after applying sealant, ensuring proper pressure management is crucial to maintain the integrity of the seal and the longevity of both the sealant and the underlying surface. Here’s a comprehensive guide to help you navigate this process effectively.

Sealants, whether used for concrete floors, tile joints, or other surfaces, undergo a curing process that transforms them from a liquid or semi-liquid state to a solid, durable material. During this curing phase, the sealant's load-bearing capacity gradually increases. It's essential to allow sufficient time for the sealant to cure fully before placing heavy furniture or applying significant pressure.
The curing time of sealants varies depending on the type of sealant used, environmental conditions such as temperature and humidity, and the thickness of the applied layer. Generally, sealants may take anywhere from a few hours to several days to reach their full load-bearing capacity. For instance, concrete sealants often require at least 24 to 72 hours of curing time before heavy furniture can be placed on them. Always refer to the manufacturer's instructions for specific curing times and conditions.
Temperature and humidity play significant roles in the curing process. Higher temperatures can accelerate curing, while lower temperatures can slow it down. Similarly, high humidity levels can affect the sealant's ability to dry and cure properly. Ensure that the environment is within the recommended temperature and humidity range specified by the sealant manufacturer to achieve optimal curing results.
Once the sealant has cured sufficiently, you can proceed with placing furniture. However, it's still important to follow certain strategies to minimize pressure and prevent damage to the sealant and the underlying surface.
When placing heavy furniture, such as sofas, beds, or cabinets, distribute the weight evenly across the surface. Avoid concentrating all the weight on a small area, as this can create excessive pressure that may damage the sealant or cause the surface to deform. Use furniture pads or coasters to help distribute the weight more evenly.
Consider placing a protective layer, such as a felt pad or a piece of plywood, between the furniture and the sealed surface. This additional layer can act as a buffer, reducing the direct pressure on the sealant and preventing scratches or other damage to the surface.
Never drag furniture across a sealed surface, as this can create friction and shear forces that may damage the sealant or the surface itself. Instead, lift the furniture and carry it to its desired location. If lifting is not possible, use furniture sliders or a dolly to move the furniture with minimal friction.
After placing furniture, it's important to monitor the sealed surfaces regularly for any signs of damage or wear. Check for cracks, chips, or other defects in the sealant, as well as any changes in the surface's appearance or texture. If you notice any issues, address them promptly to prevent further damage and maintain the integrity of the seal.
Keep the sealed surfaces clean and free of debris, as dirt and grime can accumulate over time and affect the sealant's performance. Use a soft, damp cloth to wipe down the surfaces regularly, and avoid using harsh chemicals or abrasive cleaners that may damage the sealant or the surface.
If you notice minor damage to the sealant, such as small cracks or chips, address them promptly to prevent them from becoming larger and more problematic. Depending on the severity of the damage, you may be able to repair it yourself using a sealant repair kit or by applying a fresh layer of sealant. For more significant damage, consult a professional for advice on the best course of action.
Copyright 2019 by Hangzhou Silicone Tech Adhesive Co., Ltd. All rights reserved.
Bathroom Sealant | Acrylic Sealant | Dow Corning 795 | Aquarium Sealant | Dow Corning 732 | Clear Silicone Sealant | Polysulfide Sealant | Glazing Sealant | Mirror Sealant | IG Sealant
Powered by Onepound