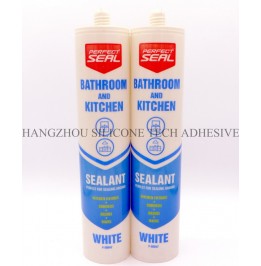
After applying sealant to surfaces like countertops, bathrooms, or construction joints, the first seven days are critical for ensuring proper curing and long-term durability. During this period, the sealant undergoes chemical reactions that harden and bond it to the substrate. Disrupting this process can lead to weak adhesion, discoloration, or premature failure. Below are essential guidelines to follow in the initial week post-application.

Moisture is one of the biggest threats to freshly applied sealants, as it can interfere with the curing process and weaken the bond.
For sealants used in wet areas like showers, sinks, or bathrooms, avoid direct water exposure for at least 72 hours, and ideally the full seven days. This means no showering, running taps, or cleaning with water-based products. Even splashes or condensation can seep into the sealant’s surface, preventing it from curing evenly. Use alternative arrangements, such as temporary covers or avoiding the area entirely, until the curing period ends.
High humidity slows down the evaporation of solvents or water from the sealant, extending the curing time. If possible, maintain indoor humidity below 50% during the first week. Use dehumidifiers in damp environments like basements or bathrooms, and ensure proper ventilation by opening windows or running fans. Avoid activities that generate excess moisture, such as boiling water or drying clothes indoors, near freshly sealed surfaces.
For exterior projects like sealing windows, doors, or roof joints, shield the area from rain or heavy dew. Use tarps, plastic sheeting, or temporary covers to prevent water from pooling on the sealant. If unexpected rain occurs, gently pat the surface dry with a clean, absorbent cloth—avoid wiping, as this may smear the uncured sealant. Reapply protection if necessary until the seven-day mark.
Fresh sealant is soft and vulnerable to scratches, dents, or displacement during the curing phase. Protecting it from physical stress ensures a smooth, even finish.
In areas like floors, countertops, or walls with freshly applied sealant, limit foot traffic or heavy objects resting on the surface. For example, avoid placing furniture, appliances, or tools on newly sealed floor joints for at least seven days. In bathrooms, refrain from hanging towels or robes on shower door frames or tile edges until the sealant has fully cured.
When cleaning or inspecting the sealed area during the first week, use gentle motions. Avoid scrubbing, scraping, or pressing hard on the sealant, as this can deform its shape or dislodge it from the substrate. If dust or debris accumulates, lightly dust the surface with a soft brush or blow it away with compressed air (at a safe distance to avoid disturbing the sealant).
Construction sites or renovation zones often have debris like sand, gravel, or metal shavings that can scratch or puncture uncured sealant. Cover the sealed area with protective film, cardboard, or drop cloths to shield it from falling objects or accidental contact with sharp tools. For vertical surfaces, use corner guards or edge protectors to prevent accidental bumps.
Certain chemicals can react with uncured sealant, altering its composition or appearance. Avoiding these substances ensures the sealant maintains its intended properties.
Solvents like acetone, alcohol, or paint thinners can dissolve or soften fresh sealant, even in small amounts. Similarly, strong household cleaners containing bleach, ammonia, or acids may chemically react with the sealant, causing discoloration or weakening. For the first seven days, clean around the sealed area with water only, using a damp cloth to wipe away dust or spills.
If additional sealing or adhesive work is needed nearby, ensure it doesn’t overlap with the freshly applied sealant. Some adhesives release fumes or contain chemicals that can migrate into the uncured sealant, disrupting its curing process. Schedule such tasks after the seven-day period, or maintain a clear separation between the two materials.
Chemical fumes from paints, varnishes, or other construction materials can settle on uncured sealant, potentially causing surface contamination or adhesion issues. When working in enclosed spaces, ensure adequate ventilation to disperse fumes away from the sealed area. If possible, complete painting or varnishing tasks before applying sealant, or postpone them until after the curing period.
Temperature and airflow play significant roles in how sealant cures. Maintaining stable, ideal conditions helps the process proceed smoothly.
Most sealants cure best at temperatures between 50°F and 90°F (10°C–32°C). Extreme cold slows down the chemical reactions, while excessive heat can cause the sealant to cure too quickly, leading to cracks or shrinkage. If temperatures fall outside this range, use space heaters (in cold weather) or fans (in hot weather) to regulate the environment. Avoid direct heat sources like radiators or open flames near the sealed area.
Stagnant air can trap moisture or fumes around the sealed surface, hindering curing. Use fans to keep air moving, especially in corners or enclosed spaces. However, avoid directing high-speed air directly onto the sealant, as this may cause uneven drying. For outdoor projects, choose days with mild wind conditions to aid natural ventilation without disrupting the sealant.
During the seven-day period, periodically inspect the sealed area for unusual odors, sticky textures, or color changes. These may indicate incomplete curing or chemical reactions. If the sealant remains tacky after three days, it may need more time or a review of environmental conditions. Contact the manufacturer for guidance if issues persist, as improper curing can compromise the sealant’s performance.
By following these precautions, you ensure the sealant cures properly, delivering a durable, waterproof, and aesthetically pleasing finish that lasts for years. Patience and attention to detail in the first week are key to avoiding costly repairs or reapplications later.
Copyright 2019 by Hangzhou Silicone Tech Adhesive Co., Ltd. All rights reserved.
Bathroom Sealant | Acrylic Sealant | Dow Corning 795 | Aquarium Sealant | Dow Corning 732 | Clear Silicone Sealant | Polysulfide Sealant | Glazing Sealant | Mirror Sealant | IG Sealant
Powered by Onepound