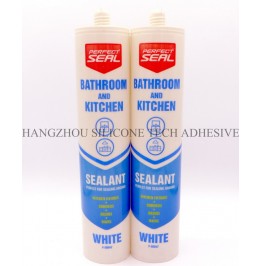
Filling irregular joints, such as those found around uneven tiles, curved fixtures, or jagged construction gaps, requires precision and adaptability. Unlike straight, uniform seams, irregular joints demand specialized approaches to ensure the sealant adheres properly, fills gaps completely, and maintains a clean, durable finish. By mastering preparation, application methods, and finishing touches, you can achieve professional results even in the most challenging spaces.

Before applying sealant, the surfaces surrounding the irregular joint must be free of dirt, dust, grease, and old adhesive residue. Use a stiff-bristled brush to scrub away loose debris, especially in crevices or uneven areas where particles may accumulate. For oily or greasy surfaces, such as kitchen backsplashes or bathroom fixtures, wipe the area with a cloth dampened in isopropyl alcohol or a mild degreaser. Allow the surfaces to dry completely, as moisture can prevent the sealant from bonding properly, leading to premature failure or mold growth.
Irregular joints often have varying depths or widths, making it difficult for sealant to fill them evenly. To address this, use a backer rod—a flexible foam or rubber strip—to create a consistent base. Choose a backer rod diameter slightly larger than the widest part of the joint, then press it into the gap until it sits just below the surface level. This not only ensures the sealant fills the joint completely but also limits its depth, reducing waste and improving flexibility. For extremely narrow or complex joints, skip the backer rod and focus on careful application techniques instead.
A caulking gun is essential for applying sealant accurately, especially in irregular joints. Select a gun with a smooth trigger mechanism and adjustable flow rate to control the amount of material dispensed. Cut the sealant tube’s nozzle at a 45-degree angle, with an opening size matching the joint’s narrowest point. Hold the gun at a consistent 45-degree angle to the joint, applying steady pressure on the trigger as you move along the seam. For curved or zigzag joints, pivot the gun smoothly to follow the contour, keeping the nozzle close to the surface to prevent air gaps.
Deep or wide irregular joints may require multiple layers of sealant to ensure proper filling and adhesion. Apply the first layer thinly, pressing it into the corners and crevices using a gloved finger or a plastic smoothing tool. Allow this layer to partially cure—usually 15–30 minutes, depending on environmental conditions—before adding a second layer. This approach prevents the sealant from sinking or cracking as it dries, creating a stronger, more durable seal. For joints with extreme variations in depth, consider using a combination of backer rod and layered application to achieve the best results.
Curved joints, such as those around round fixtures or arched windows, demand a different strategy than straight seams. Start by applying a small bead of sealant along the curve, then use a damp finger or a rounded tool to smooth it into place, following the contour of the joint. For angular joints with sharp turns or corners, apply the sealant in short sections, smoothing each part before moving to the next. This prevents the material from pooling or stretching unevenly, ensuring a consistent finish. If the joint has both curved and straight sections, blend the application techniques seamlessly for a cohesive look.
Once the sealant is applied, use a smoothing tool or your finger to shape it into a neat, concave bead. Dip the tool or finger in water or a soap solution to prevent sticking, then run it along the joint at a 45-degree angle, applying light pressure. For irregular joints, adjust the angle and pressure as needed to follow the contour of the seam. If the sealant appears uneven or has air bubbles, gently press it back into place with the tool or finger. Avoid overworking the material, as this can weaken the bond or create a rough texture.
Excess sealant can ruin the appearance of an irregular joint and make cleanup more difficult. Use a damp cloth or sponge to wipe away any material that has spread beyond the joint line, working quickly before it dries. For precise cleanup, wrap a piece of masking tape around your finger, with the sticky side facing out, and press it lightly along the edges of the joint to lift away stray sealant. Discard the used tape and repeat as necessary until the area is clean. If the sealant has already started to cure, use a plastic scraper or razor blade to carefully trim the excess, taking care not to scratch the surrounding surfaces.
After smoothing and cleaning the joint, inspect it carefully for any gaps, air bubbles, or thin spots where the sealant may not have adhered properly. Shine a light along the seam at a low angle to highlight imperfections, or run your finger gently over the surface to feel for inconsistencies. If you find any issues, reapply sealant to the affected area and smooth it out again. Addressing these problems early ensures the joint remains watertight and durable, preventing future leaks or damage.
By following these techniques for preparing irregular joints, applying sealant with precision, and achieving a polished finish, you can tackle even the most complex sealing projects with confidence. Whether you’re working on a bathroom remodel, kitchen renovation, or outdoor construction, these methods will help you create strong, long-lasting seals that enhance both function and aesthetics.
Copyright 2019 by Hangzhou Silicone Tech Adhesive Co., Ltd. All rights reserved.
Bathroom Sealant | Acrylic Sealant | Dow Corning 795 | Aquarium Sealant | Dow Corning 732 | Clear Silicone Sealant | Polysulfide Sealant | Glazing Sealant | Mirror Sealant | IG Sealant
Powered by Onepound