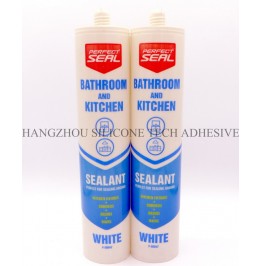
Managing Workflow Speed When Applying Fast-Curing Sealants in Construction Projects
Fast-curing sealants are popular for their quick drying times, but they demand precise timing and coordination during application. Misjudging the pace can lead to uneven finishes, wasted material, or compromised adhesion. Understanding how to control the workflow ensures smooth execution and professional results, even under tight deadlines.

The foundation of a seamless process lies in thorough preparation. Start by organizing all tools and materials before opening the sealant container. Lay out caulk guns, spatulas, cleaning supplies, and protective gear within easy reach. For large-scale projects, divide the workspace into sections to avoid rushing between tasks.
Surface preparation is equally critical. Ensure surfaces are clean, dry, and free of dust or old sealant residue. Use a scraper or sandpaper to smooth rough edges, then wipe the area with a damp cloth followed by a dry one. If the environment is humid, consider using dehumidifiers or fans to accelerate surface drying, as moisture can interfere with curing.
Test the sealant’s consistency on a scrap piece of material before starting the main application. This helps you gauge how quickly it flows and sets, allowing you to adjust your technique accordingly. If the sealant cures faster than expected, work in smaller batches to maintain control over each section.
Fast-curing sealants leave little room for hesitation. Begin by applying the sealant in straight, continuous lines, keeping the caulk gun at a consistent 45-degree angle. For vertical surfaces, start at the top and work downward to prevent drips. Move at a steady pace that matches the sealant’s curing rate—too slow, and it may harden before smoothing; too fast, and the joint may appear uneven.
Use a damp finger or plastic spatula to shape the sealant immediately after application. Light pressure is often enough to create a smooth finish without disturbing the bond. If the sealant starts to skin over before tooling, stop and clean the excess from your tools, then resume working on the next section.
In areas requiring intricate detailing, such as corners or edges, prioritize speed without sacrificing accuracy. Consider using a smaller nozzle on the caulk gun for better precision. For large joints, apply the sealant in layers, allowing each layer to partially cure before adding the next. This prevents slumping and ensures a uniform appearance.
When moving from one section to another, clean your tools promptly to avoid hardened residue. Keep a container of water and a rag nearby for quick wipe-downs. If the sealant cures on your spatula or caulk gun, use a plastic scraper to remove it before it becomes impossible to clean.
Coordinate with team members if the project involves multiple workers. Designate roles such as applicator, smoother, and cleaner to maintain a steady rhythm. For example, while one person applies the sealant, another can follow behind to shape it, and a third can prepare the next section. This reduces downtime and prevents bottlenecks.
If unexpected interruptions occur, such as a phone call or equipment issue, cover the partially cured sealant with a damp cloth to slow down the drying process temporarily. However, avoid leaving it uncovered for more than a few minutes, as this can lead to inconsistent curing and weak spots in the joint.
Temperature and humidity play significant roles in how fast-curing sealants behave. In cold conditions, the sealant may take longer to set, allowing more time for tooling but increasing the risk of uneven drying. Conversely, high temperatures or low humidity can accelerate curing, forcing you to work faster.
Adjust your workflow based on the environment. On hot days, work early in the morning or late in the afternoon when temperatures are cooler. If the workspace is poorly ventilated, use fans to improve airflow and prevent the sealant from curing too quickly on the surface while remaining tacky underneath.
For outdoor projects, monitor weather forecasts closely. Rain or dew can disrupt curing, so schedule applications during dry periods. If rain is imminent, cover freshly applied sealant with plastic sheeting secured with tape, ensuring no moisture seeps underneath.
Even with careful planning, minor imperfections may occur. Inspect each joint as you go, looking for gaps, bubbles, or uneven edges. Use a utility knife or a sealant smoothing tool to correct issues while the material is still slightly pliable. For small bubbles, prick them with a pin and press the sealant flat.
Allow the sealant to cure fully before exposing it to stress or moisture. Refer to the manufacturer’s guidelines for recommended curing times, but keep in mind that environmental factors may alter these estimates. Test a small area by gently pressing the sealant with your fingernail—if it leaves no mark, it’s likely ready for use.
Store unused sealant properly to maintain its fast-curing properties. Seal the container tightly and store it in a cool, dry place away from direct sunlight. If the sealant thickens or separates over time, discard it and use a fresh batch to ensure optimal performance.
By mastering these techniques, you can control the workflow when using fast-curing sealants, achieving durable, professional results without unnecessary stress or rework.
Copyright 2019 by Hangzhou Silicone Tech Adhesive Co., Ltd. All rights reserved.
Bathroom Sealant | Acrylic Sealant | Dow Corning 795 | Aquarium Sealant | Dow Corning 732 | Clear Silicone Sealant | Polysulfide Sealant | Glazing Sealant | Mirror Sealant | IG Sealant
Powered by Onepound