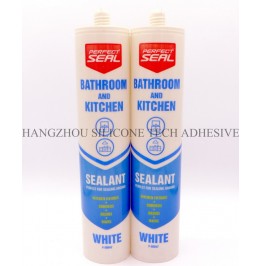
Mastering Bathroom Sealant Application: Speed and Uniformity Control Techniques
Bathroom sealant application is a critical step in preventing water damage, mold growth, and structural deterioration. Achieving optimal speed and uniformity during application requires a combination of proper preparation, tool selection, and technique refinement. Below are actionable strategies to elevate your sealant work.

The foundation of a durable sealant joint lies in meticulous surface cleaning. Residual soap scum, moisture, or old sealant remnants can compromise adhesion, leading to premature failure. Start by scraping away any existing sealant using a plastic or silicone-safe scraper, ensuring no fragments remain in the joint. For stubborn residues, a solution of equal parts water and white vinegar can dissolve mineral deposits without damaging surfaces.
Next, focus on drying the joint thoroughly. Use a hairdryer on a low-heat setting to accelerate evaporation in humid environments, but avoid overheating, which may warp adjacent materials. For porous surfaces like ceramic tiles, wipe the area with a lint-free cloth soaked in isopropyl alcohol to eliminate microscopic contaminants. Allow the surface to air-dry for 10–15 minutes before proceeding.
The right tools streamline application and enhance consistency. A high-quality caulk gun with a smooth trigger mechanism reduces hand fatigue and ensures steady flow control. Opt for a model with a rotating frame to navigate tight corners effortlessly. For the nozzle, trim it at a 45-degree angle to create a beveled edge that matches the joint’s width. A narrower nozzle (3–5mm) works best for small gaps, while wider openings (6–10mm) suit larger joints.
To maintain uniformity, practice dispensing a small amount of sealant onto a disposable surface before starting. Adjust the gun’s pressure or nozzle size if the flow is too fast or slow. For vertical joints, tilt the gun slightly upward to counteract gravity and prevent sagging.
Achieving a professional finish hinges on mastering the “pull-and-press” method. Hold the gun at a 45-degree angle to the joint, applying consistent pressure on the trigger as you move steadily along the seam. Aim for a continuous bead without pausing, as stops and starts create visible seams. For horizontal joints, maintain a steady pace of 10–15 cm per second to balance speed and control.
Immediately after applying the sealant, use a silicone smoothing tool or a wet finger (dipped in soapy water) to shape the bead into a concave curve. This not only enhances aesthetics but also improves water shedding. Work in sections of 30–50 cm to prevent the sealant from skinning over before smoothing.
Temperature and humidity significantly impact cure time and adhesion. Ideal conditions fall between 15°C and 25°C with relative humidity below 60%. In hot climates, work early in the morning or late afternoon to avoid direct sunlight, which can accelerate curing and make the sealant tacky. Conversely, cold environments may require a space heater to maintain workability.
If rain is forecasted within 24 hours, postpone outdoor-adjacent bathroom projects to prevent moisture ingress during curing. For high-humidity areas, use a dehumidifier to reduce ambient moisture levels, ensuring the sealant cures as intended.
Once the sealant is shaped, avoid touching or disturbing the joint for at least 12 hours. Place “wet cure” signs or tape barriers to alert household members. After 24 hours, inspect the joint for any shrinkage or gaps. If needed, apply a second, thinner layer to fill voids, but avoid overloading the joint, which can lead to cracking.
For long-term maintenance, clean the sealant monthly with a mild detergent and a soft brush to prevent mold buildup. Avoid abrasive cleaners or steel wool, which can scratch the surface and degrade the material.
By integrating these techniques into your workflow, you can achieve bathroom sealant joints that are both visually appealing and functionally robust. Consistency in preparation, tool use, and application method ensures lasting protection against water damage, even in high-traffic bathrooms.
Copyright 2019 by Hangzhou Silicone Tech Adhesive Co., Ltd. All rights reserved.
Bathroom Sealant | Acrylic Sealant | Dow Corning 795 | Aquarium Sealant | Dow Corning 732 | Clear Silicone Sealant | Polysulfide Sealant | Glazing Sealant | Mirror Sealant | IG Sealant
Powered by Onepound