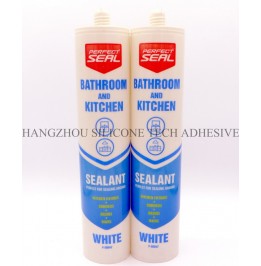
Accurate Material Quantity Calculation for Bathroom Sealant Application
Estimating the correct amount of sealant for bathroom projects—such as sealing joints around showers, tubs, sinks, or floor tiles—is critical to avoid waste or insufficient coverage. Overestimating leads to unused material, while underestimating risks leaks or repeated trips to restock. Below are structured methods to calculate sealant quantities based on surface dimensions, joint types, and application techniques.

Start by gathering precise measurements of all areas requiring sealant to establish a baseline for calculations.
Identifying All Sealed Joints:
List every gap or seam in the bathroom that needs sealing, including vertical corners (e.g., shower walls meeting the floor), horizontal joints (e.g., tub edges), and gaps between tiles.
Using a Measuring Tape for Accuracy:
Measure each joint’s length in meters or feet. For irregular shapes, break the area into smaller sections and sum their lengths. Record measurements separately for vertical and horizontal joints, as some sealants may have varying coverage rates.
Accounting for Overlaps and Corners:
Add 10–15% to the total joint length to account for overlaps where two sealed surfaces meet (e.g., inner corners of a shower enclosure). This buffer ensures full coverage without gaps.
Understand how much area a single tube of sealant can cover based on its diameter and the joint width being sealed.
Calculating Bead Volume:
Sealant coverage depends on the cross-sectional area of the applied bead. For a standard 6mm (¼-inch) diameter bead, the volume per meter is approximately 0.003 cubic meters (or 3 liters per 100 meters). Adjust this for wider or narrower joints.
Adjusting for Joint Width and Depth:
If the joint is wider than the sealant’s recommended width (e.g., 10mm instead of 6mm), the coverage per meter decreases. Use the formula:
Coverage (meters per tube) = Tube volume (liters) ÷ (Bead cross-sectional area × 1000)
For example, a 300ml tube sealing a 10mm-wide, 5mm-deep joint covers roughly 6 meters.
Factoring in Application Technique:
Tooling the sealant (smoothing with a finger or tool) may compress the bead, slightly increasing coverage. Conversely, uneven application or multiple passes could reduce it. Assume a 90% efficiency rate for realistic estimates.
Combine joint measurements and coverage rates to determine the total material required, including buffers for errors.
Total Joint Length Calculation:
Sum all measured joint lengths (vertical + horizontal) and multiply by 1.1–1.15 to include overlaps and waste. For example, 20 meters of joints × 1.15 = 23 meters.
Tube Quantity Breakdown:
Divide the adjusted total joint length by the coverage per tube. If one tube covers 8 meters, 23 meters would require 3 tubes (23 ÷ 8 = 2.875, rounded up).
Considering Multi-Step Applications:
Some projects require two coats for durability (e.g., high-moisture areas). Double the material estimate if a second layer is necessary, adding a 5% buffer for touch-ups.
Even with precise calculations, unexpected factors like uneven substrates or tooling errors can increase material use.
Adding a Waste Allowance:
Include an extra 10–20% of the total calculated sealant to cover mistakes, such as over-tooling, air bubbles, or resealing sections that didn’t adhere properly.
Preparing for Substrate Variations:
Older bathrooms with uneven tiles or damaged grout may require more sealant to fill gaps. Inspect the area thoroughly and adjust estimates if joints are deeper than average.
Storing Leftover Material:
If purchasing slightly more than needed, ensure the sealant is stored in a cool, dry place for future repairs. Many sealants have a shelf life of 12–24 months when unopened.
By following these steps, bathroom projects can minimize material waste while ensuring all joints are fully sealed. Accurate calculations reduce costs and prevent delays caused by running short mid-project.
Copyright 2019 by Hangzhou Silicone Tech Adhesive Co., Ltd. All rights reserved.
Bathroom Sealant | Acrylic Sealant | Dow Corning 795 | Aquarium Sealant | Dow Corning 732 | Clear Silicone Sealant | Polysulfide Sealant | Glazing Sealant | Mirror Sealant | IG Sealant
Powered by Onepound