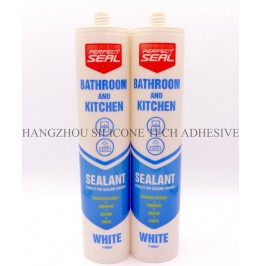
Bathroom sealants, once cured, are exposed to constant moisture, humidity, and organic matter—conditions that create ideal environments for mold and mildew. Without proper maintenance, these substances can degrade sealant integrity, compromise hygiene, and trigger respiratory issues. Implementing preventive measures early ensures long-lasting protection and a cleaner bathroom environment.

Mold thrives in warm, damp areas with limited airflow, such as shower corners, bathtub edges, and sink joints. Cured sealants often develop tiny cracks or pores over time, allowing water to seep beneath the surface. This trapped moisture, combined with soap scum or skin cells, provides nutrients for mold colonies. Recognizing these vulnerabilities helps tailor prevention strategies effectively.
Even well-cured sealants may have microscopic imperfections where mold spores can anchor. Smooth, non-porous surfaces resist colonization better than rough or textured ones. Regularly inspecting sealant joints for cracks or discoloration helps identify early signs of moisture intrusion, enabling prompt intervention before mold spreads.
Proper airflow is critical for reducing humidity levels in bathrooms. Without adequate ventilation, condensation accumulates on surfaces, including sealants, creating persistent dampness. Opening windows after showers, using exhaust fans, or installing dehumidifiers can significantly lower moisture content in the air.
Exhaust fans should run during and for at least 20 minutes after showering to expel humid air. Ensure fans are vented outdoors rather than into attics or adjacent rooms, as this merely redistributes moisture. Clean fan blades and vents monthly to prevent dust buildup, which can reduce efficiency and trap moisture.
Regular cleaning disrupts mold’s ability to establish colonies on sealants. Use non-abrasive tools like soft brushes or microfiber cloths to avoid scratching the surface, which could create entry points for moisture. Focus on areas where water pools, such as the base of shower doors or bathtub ledges.
White vinegar diluted with water (1:1 ratio) acts as a natural mold inhibitor. Spray the solution onto sealants, let it sit for 10–15 minutes, then scrub gently. The acidity disrupts mold growth without damaging the sealant. For stubborn spots, baking soda paste (mixed with water) can be applied as a mild abrasive. Rinse thoroughly and dry the area with a clean towel.
Over time, cured sealants may develop small gaps due to temperature fluctuations or movement. These openings allow water to penetrate beneath the surface, fostering hidden mold growth. Inspect sealants biannually for cracks or shrinkage, especially near joints and corners.
If minor gaps are detected, clean the area thoroughly and allow it to dry completely. Use a small amount of compatible sealant to fill the crack, smoothing it with a damp finger or tool. Ensure the new sealant bonds properly to the existing material to prevent future water ingress.
Soap scum, body oils, and dead skin cells accumulate on sealant surfaces, providing food for mold. Regularly wiping down sealants with a damp cloth after use minimizes organic matter. For heavy buildup, a mixture of mild dish soap and warm water can break down residues without harsh chemicals.
After cleaning, use a squeegee or dry cloth to remove excess water from sealants and surrounding tiles. Leaving surfaces wet encourages mold growth, so prioritize thorough drying, particularly in hard-to-reach areas. Consider using a towel to pat dry corners and edges where moisture tends to linger.
By integrating these practices into regular bathroom maintenance, homeowners can significantly reduce the risk of mold formation on cured sealants. Consistent attention to ventilation, cleaning, and surface integrity ensures a hygienic and durable bathroom environment.
Copyright 2019 by Hangzhou Silicone Tech Adhesive Co., Ltd. All rights reserved.
Bathroom Sealant | Acrylic Sealant | Dow Corning 795 | Aquarium Sealant | Dow Corning 732 | Clear Silicone Sealant | Polysulfide Sealant | Glazing Sealant | Mirror Sealant | IG Sealant
Powered by Onepound